Drift cars have become a popular subject among artists and car enthusiasts alike. Drawing a drift car requires attention to detail and a good understanding of the car’s unique design. Let’s learn how to draw a drift car.
In this article, we’ll review some detailed steps to follow when drawing a drift car.
- Gather reference images
- Sketch the outline of the car
- Shade the body of the car
- Add details to the car
- Draw the wheels
- Draw the interior of the car
- Add lighting and shadows
- Add background elements
- Adding color to the drift car
- Adding logos and other decorations
- Give finishing touches – adding highlights and finalizing the drawing
How to Draw a Drift Car
Gather reference images

The first step in drawing a drift car is to gather reference images. Reference images will help you understand the car’s shape, proportions, and details.
Look for images of the specific drift car you want to draw, and try to find images from different angles and in different lighting conditions.
This will give you a more comprehensive view of the car and help you understand its details better.
Sketch the outline of the car.

Once you have your reference images, sketch the car’s outline.
Use a light pencil to create rough sketches until you get the car’s shape right. It’s important to take your time at this stage and get the proportions right.
Pay attention to the angles and curves of the car to ensure you get the shape accurately.
Shade the body of the car.

After sketching the outline, it’s time to start shading the car’s body. Start with the main shape and move down to the smaller details.
Use various shading techniques, such as crosshatching and blending, to add depth and texture to the drawing. Use your reference images to get the shadows and highlights right.
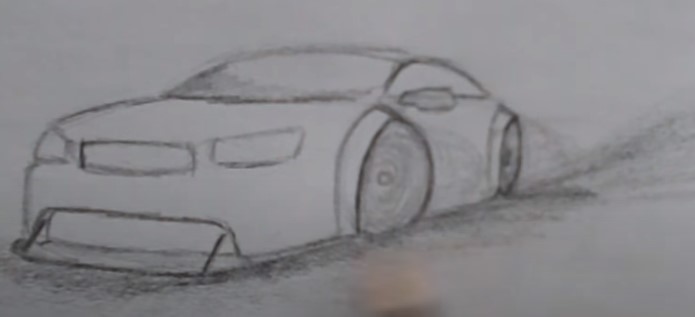
Add details to the car.
Once you have shaded the car’s body, it’s time to add the details. Drift cars have unique designs, so take your time to study your reference images and get the details right.

You can add details by just observing the following pics one by one. After that, sketch it on your white paper.
Add the headlights, grille, and other unique features to the model you draw.
Draw the wheels
Drift cars are known for their unique wheel designs. Take your time to draw the wheels accurately and with the appropriate level of detail.

The wheels are often the most important part of the car’s design and can make or break the overall look of the drawing.
Draw the interior of the car.
After you have drawn the car’s exterior, it’s time to draw the interior. Use reference images to draw the seats, dashboard, and other details.
The interior is often less visible in a drift car drawing, but it’s still important to get it right to add depth and detail to your drawing.
Add lighting and shadows.
Adding lighting and shadows will help give your drawing depth and realism.

Use shading techniques to create the illusion of light and shadow. Study your reference images to get the shadows and highlights right and to create a realistic effect.
Add background elements
Adding a background to your drawing can help to set the scene and add context. You could draw a race track, a city skyline, or any other setting that fits the car.
Take your time to study your reference images and get the background right. You want it to complement the car and not overpower it.
Adding logos and other decorations

Drift cars often have logos. You can write DRIFT on it and other decorations on them. Take time to add these details to your drawing, as they can make all the difference in making it look authentic.
Use your reference images to get the logos and decorations right, and gently add them to the drawing.
Give finishing touches – adding highlights and finalizing the drawing
The final step in drawing a drift car is to add highlights and finishing touches. Use a white pencil or eraser to create highlights on the car’s body, wheels, and other areas.

This will give the drawing a more realistic look and make it pop. Take time to finalize the drawing and ensure all the details are accurate.
Adding color to the drift car
Once you have completed the line drawing, it’s time to add color. Use colored pencils, markers, or digital software to color the car.
Use your reference images to get the colors and patterns as accurate as possible. Drift cars are often colorful, so take your time to get the colors right.
Expert Opinion
Drawing a drift car requires patience, attention to detail, and a good understanding of the car’s unique design.
Following the steps outlined in this article, you can create a detailed and accurate drawing of a drift car that will impress your friends and family.
Remember to take your time and use your reference images to get the details right. And don’t be afraid to experiment with different shading and coloring techniques to create a unique and eye-catching drawing.
You can become an expert at drawing drift cars and other vehicles with practice and dedication.

James Carter is an automotive blogger, reviewer, and technology enthusiast based in the USA. With a deep passion for cars and years of experience following the automotive industry, James focuses on delivering honest, well-researched content that helps readers make smarter decisions.