Installing a car stereo system can seem daunting, but with the right tools and a little knowledge, it can be a straightforward and rewarding DIY project. In this article, we will guide you through the steps of how to install a car stereo system wiring diagram, from gathering the basic tools and parts needed to final connections and setup.
These following are the steps we are going to follow:
- Gather Basic Tools and Parts Needed for Installation
- Choose the Right Wiring Kit
- Disconnect the Negative Battery Cable
- Connect the Wiring Harness to the Stereo
- Mount the Stereo and Connect the Wires
- Connect the Wiring Harness to the Car
- Test the Stereo System
- Installing the Antenna and Speakers
- Final Connections and Setup
How to Install a Car Stereo System Wiring Diagram
Gather Basic Tools and Parts Needed for Installation
Before you start, gathering the basic tools and parts you will need for the installation is important. This includes:

- A wiring kits.
- Wire strippers.
- A crimping tool.
- Pliers.
- Screwdrivers
- A socket set
You will also need a mounting kit, a dash kit, and any necessary adapters for your specific car model.
Choose the Right Wiring Kit

Choosing the right wiring kit is critical to the success of your installation.
Wiring kits come in different sizes and types, so choose one compatible with your stereo and car model. A good wiring kit will include all the necessary wires and connectors to ensure a secure and reliable connection.
Disconnect the Negative Battery Cable

Safety is paramount when working with car electronics. Before installing, disconnect the negative battery cable to avoid any electrical shocks or damage to your car’s electrical system.
Connect the Wiring Harness to the Stereo

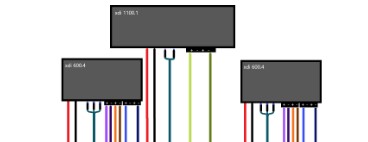
Once you have the wiring kit and tools ready, the first step is to connect the wiring harness to the stereo. This is usually done by matching the wire colors from the stereo to the corresponding wires on the harness. Make sure to use crimp connectors to ensure a secure connection.
If you do it wrong, it will not work well.
Mount the Stereo and Connect the Wires

With the wiring harness connected to the stereo, it’s time to mount it into the dash. This may require removing the existing stereo or dashboard panels.
Once the stereo is mounted, connect the wires from the harness to the car’s wiring system. Make sure to follow the wiring diagram carefully to avoid any mistakes.
Connect the Wiring Harness to the Car

After the wiring is connected, it’s time to connect the wiring harness to the car. This involves matching the wire colors from the harness to the corresponding wires in the car’s wiring system. Use crimp connectors to ensure a secure connection, and test each connection as you go.
Test the Stereo System
With the wiring and connections complete, it’s time to test the stereo system. Reconnect the negative battery cable and turn on the stereo. Ensure that all the functions are working correctly, including the radio, CD player, and any other stereo features.
Installing the Antenna and Speakers

Once the stereo system works correctly, installing the antenna and speakers is time. The antenna is usually mounted on the car’s exterior, while the speakers are mounted inside. Follow the instructions carefully to ensure a secure and reliable installation.
Final connections and setup
With the antenna and speakers installed, it’s time to make any final connections and set up the stereo system. This may include programming any settings or preferences, such as the radio stations, equalizer settings, and sound balance. Make sure to follow the instructions carefully to avoid any mistakes.
My Opinion
Installing a car stereo system wiring can be challenging, but doing it yourself with the right tools and instructions is possible.
The first step is to gather all the necessary tools and materials, including a wiring harness adapter, crimp connectors, electrical tape, and wire strippers.
The next step is disconnecting the battery and removing the old stereo system. It is important to adhere to the wiring diagram accompanying the new stereo system to connect the wires correctly.
The wiring harness adapter can connect the wires from the car to the new stereo system. The ground wire should be connected to a metal part of the car’s chassis to prevent electrical interference.
Once all the wires are connected, the stereo system can be installed in the dash and secured. Finally, the battery can be reconnected, and the system can be tested to ensure it works correctly.

James Carter is an automotive blogger, reviewer, and technology enthusiast based in the USA. With a deep passion for cars and years of experience following the automotive industry, James focuses on delivering honest, well-researched content that helps readers make smarter decisions.