
If you’re a fan of remote-control cars, you may be interested in building your own RC car from scratch. In this article, we’ll guide you through how to make rc car, including gathering materials, assembling the frame, installing the electronics, and more.
Building an RC car can be a rewarding and exciting experience, allowing you to customize the car to your preferences and specifications.
These are the steps that we are going to follow:
- Gather the materials and tools needed to build an RC car
- Cut the chassis and assemble the frame
- Install the motor and the battery
- Attach the wheels and tires
- Connect the electronics and programmable components
- Assemble the body and the aerodynamic components
- Add the remote-control system
- Set up the Suspension System
- Add the Motor and Battery Pack
- Install the Wheels and Tires
- Finish the Bodywork
- Finetuning the RC Car
- Test and adjust the RC car
- Paint and decorate the car
- Enjoy your RC car!
How to Make RC Car
Gather the Materials and Tools Needed to Build an RC Car
Before you can begin building your RC car, you’ll need to gather the necessary materials and tools. This includes:
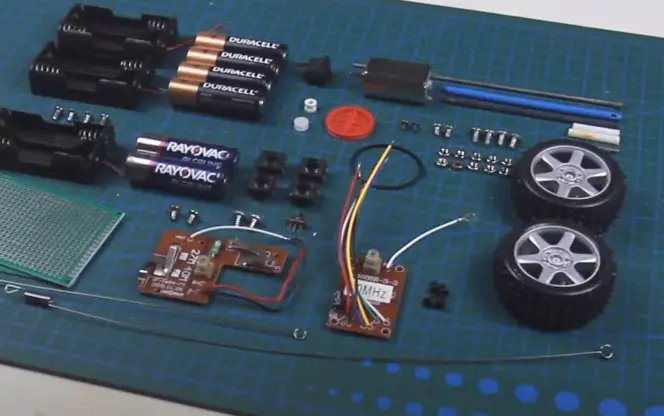
- A chassis kit.
- Motor.
- Battery.
- Wheels.
- Tires.
- Electronics.
- Programmable components.
- Suspension system.
- Remote control system.
- Bodywork materials.
- Paint.
- Decorating supplies.
You’ll also need tools such as:
- Pliers.
- Screwdrivers.
- A soldering iron.
Cut the Chassis and Assemble the Frame
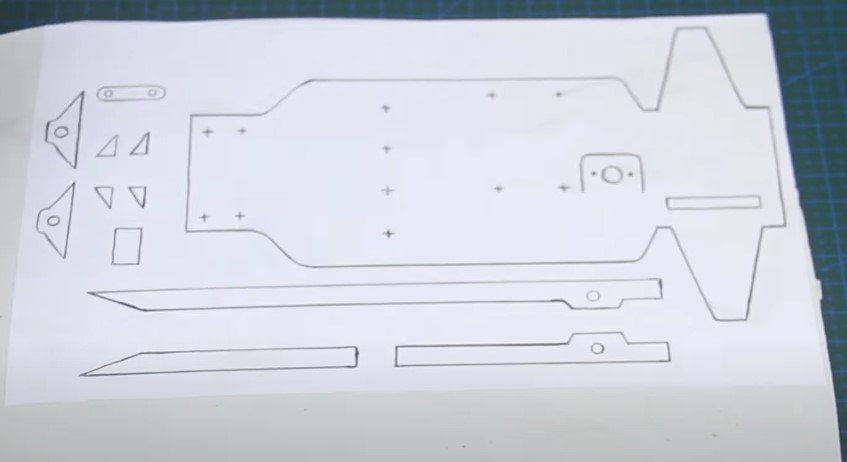
The first step in building your RC car is to cut the chassis and assemble the frame.
You can purchase a pre-cut chassis kit or create your own from scratch using various materials such as plastic, carbon fiber, or aluminum.

Once you have your chassis, you can assemble the frame, including the suspension system and other necessary components.
Install the Motor and Battery
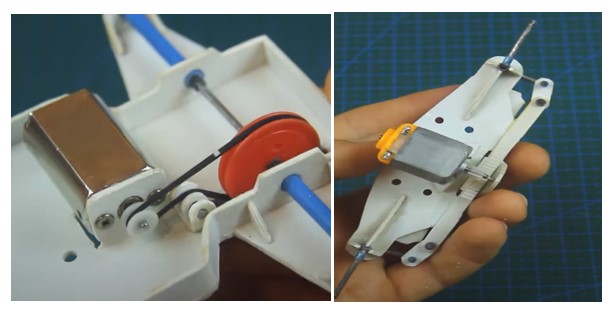
Once you’ve assembled the frame, it’s time to install the motor and battery.
You’ll need to choose a motor suitable for your desired speed and performance level and a battery pack that can provide sufficient power to run the car.
You’ll also need to install a speed controller to regulate the motor’s speed.
All you have to do is fix it in the right position and tighten it with screws.
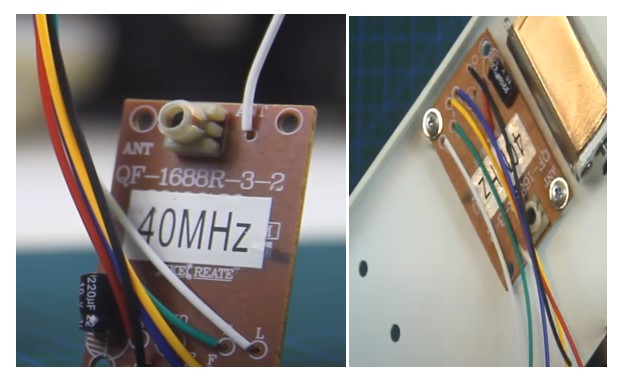
After that, you must install the motor driver, as shown in the picture above.
You can install it by attaching it with glue or screwing it.
Install the Wheels and Tires
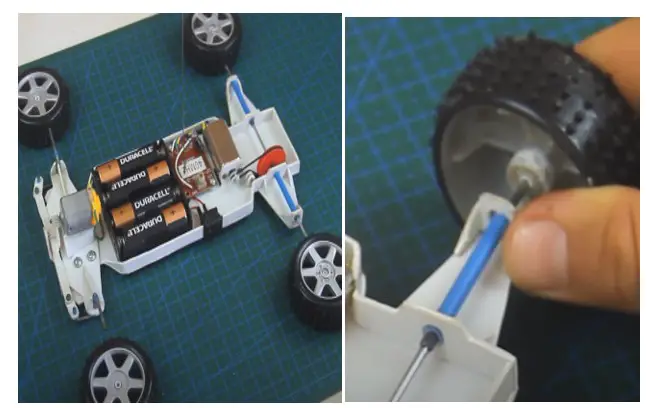
The next step in building an RC car is to install the wheels and tires. Various wheels and tires are available in the market, but you should choose the ones compatible with your car’s design and size.
Ensure the wheels and tires are assembled properly and secured to the car’s chassis.
This is important for the car’s performance and stability. Improperly installed wheels and tires can cause accidents and damage to the car.
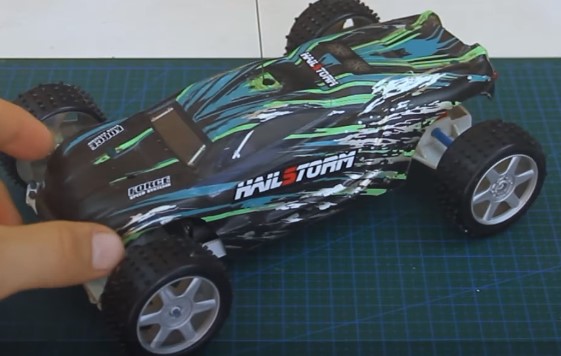
Finish the Bodywork
The next step in building an RC car is to finish the bodywork. This involves painting and decorating the car’s body for a customized look.
You can use different paints and decals to give your car a unique look.
Make sure that you use durable and long-lasting, high-quality paints and decals. You can also add some graphics or designs to make the car look more attractive.
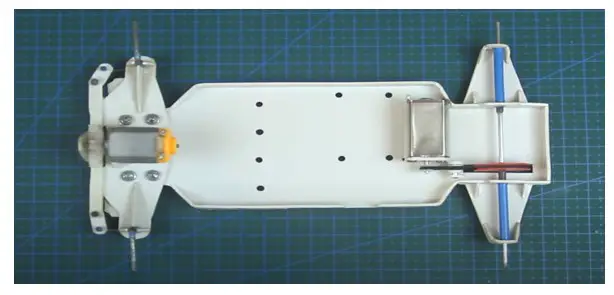
Fine-tuning the RC Car

Once you have assembled all the parts and components of the RC car, it’s time to fine-tune it.
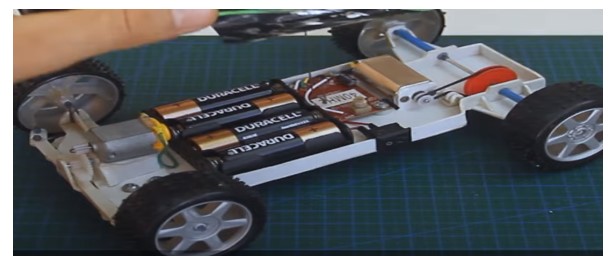
This involves adjusting the settings and components to optimize the car’s performance and speed.
You can adjust the suspension, battery, gear ratio, motor timing, and other settings to achieve the desired performance. Adjust gradually and test the car after each adjustment, as shown in the above pictures.
Paint and Decorate the Car
You can paint and decorate once you have fine-tuned and tested the RC car. You can use different colors, graphics, and decals to make the car look unique and attractive.
Make sure that you use durable and long-lasting, high-quality paints and decals. You can add finishing touches to the car, such as chrome or metal trims.
Test and adjust the RC Car

The next step is to test and adjust the RC car. This involves driving the car and observing its performance and speed.
You can also make further adjustments to the car’s settings and components to improve performance.
Make sure that you test the car in a safe and open area, away from people and objects that can cause accidents or damage to the car.
Enjoy Your RC Car!
After completing all the steps, your RC car is ready to use. You can now enjoy driving and competing with other RC car enthusiasts.
Remember to take good care of your car and perform regular maintenance to ensure its longevity and performance.
Your RC car can provide hours of fun and excitement with proper care and maintenance.
My Opinion
This article provides a comprehensive guide on how to build your own RC car. It outlines the step-by-step process from gathering materials to performing regular maintenance and care.
The article covers everything from cutting the chassis and assembling the frame to installing the motor and battery, attaching wheels and tires, connecting electronics and programmable components, and assembling the body and aerodynamic components.
The guide also includes tips on setting up the suspension system, fine-tuning the car, and testing and adjusting it. Additionally, the article covers the importance of regular maintenance and care for the car, providing advice on cleaning the car, checking the battery and motor, inspecting the tires, lubricating the moving parts, and storing the car properly.
Finally, the article touches on upgrades and modifications, highlighting the availability of aftermarket parts and components to improve the car’s performance and speed. Overall, this article is an excellent resource for anyone interested in building their RC car and customizing it to their preferences.
I am an Automotive specialist. I graduated from Michigan with Bachelor in Automotive Engineering and Management. Also, I hold degrees in Electrical and Automation Engineering (BEng), Automatic and Industrial Electronic Engineering, and Automotive Technology. I have worked at General Motors Company for over five years as the Marketing Operations Production Coordinator. Now, I own my garage in Miami, Florida. I love cars and love to share everything about them with my readers. I am the founder of the Automotiveex blog, where I share everything about automotive, like car news, car mechanical issues, and anything else that comes up in my blog posts.

")


