How to Live in Your Car with a Dog | 11-Step Guide [2023 Update]

0

Living in a car with a dog is difficult, but it can be done with the right preparation and mindset. In this article, we will discuss some tips on how to live in your car with a dog.

Whether you are living in your car out of necessity or by choice, it is important to consider your pet’s well-being and safety. 

These are the points that we are going to follow:

  • Research the local laws regarding living in your car with a pet
  • Find a safe place to park – preferably away from people
  • Pack the essentials – food, water, toys, and bedding
  • Consider using a car cover to protect your car and your pet
  • Keep your car clean and comfortable
  • Make sure your pet has regular exercise 
  • Find a veterinarian in the area
  • Monitor your pet’s health
  • Staying Connected: Finding Wi-Fi and Phone Services
  • Create a budget for living in your car with your pet
  • Seek out resources in the area for pet owners

How to Live in Your Car with a Dog

Research the local laws regarding living in your car with a pet.

Research the local laws regarding living in your car with a pet.

Before embarking on this lifestyle, it is crucial to research the local laws regarding living in your car with a pet. 

Some cities and states have strict regulations, so knowing what you are getting into is important. 

Some areas may require pets to be on a leash or have certain vaccinations, so check the laws and regulations in the area you plan to stay.

Find a safe place to park

Find a safe place to park

Finding a safe parking place is essential when living in a car with a dog. Look for a quiet and secluded place, preferably away from people. 

You don’t want to attract unwanted attention, and your dog will appreciate a peaceful place to rest. Consider parking in a camping or RV park, as pet facilities often exist.

Pack the essentials

Pack the essentials

When living in a car with a dog, it is important to pack the essentials. This includes food, water, toys, and bedding. 

Make sure to bring enough food and water for your dog and a bowl for them to eat and drink from. 

Bring some toys to entertain your dog and a comfortable blanket or bed.

Consider using a car cover to protect your car and your pet.

Consider using a car cover to protect your car and your pet.

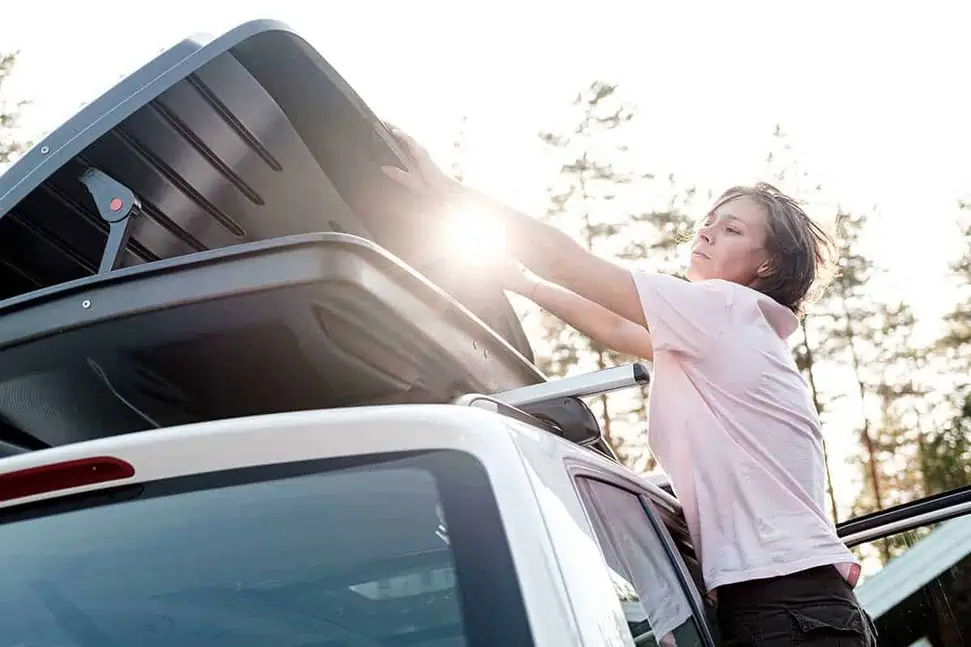
A Car cover is a great way to protect your car and pet from the elements. 

It can provide shade on hot days and keep your car cooler. Make sure to choose a breathable cover that provides enough ventilation for your dog.

Keep your car clean and comfortable.

Keep your car clean and comfortable.

Living in a car can be uncomfortable, but it doesn’t have to be. Keep your car clean and tidy, and create a comfortable space for your dog. 

This can include adding cushions or pillows and ensuring enough space for your dog to move around.

Make sure your pet has regular exercise.

Make sure your pet has regular exercise.

Regular exercise is essential for your dog’s health and well-being. Take your dog for walks or runs daily to ensure they get enough exercise. 

Consider visiting dog parks or other outdoor areas where your dog can socialize with other dogs.

Find a veterinarian in the area.

Find a veterinarian in the area.

Finding a veterinarian in the area is important if your dog gets sick or injured. 

Make sure to research the local veterinarians and find a reliable and affordable one. Keep their contact information handy in case of an emergency.

Monitor your pet’s health.

Monitor your pet's health.

Living in a car can be stressful for pets, so it is important to monitor their health. Keep an eye on their behavior and look out for any signs of illness or discomfort. Take your dog to the veterinarian if you notice any unusual behavior.

Staying Connected: Finding Wi-Fi and Phone Services

Staying Connected: Finding Wi-Fi and Phone Services

Staying connected is essential when living in a car with a dog. Find a reliable Wi-Fi and phone service provider in the area. 

This can help you stay in touch with loved ones and access important information online.

Create a budget for living in your car with your pet

Living in a car can be a cost-effective option, but it is important to create a budget. 

This includes budgeting for food, water, gas, and any other expenses you may have. Include your dog’s expenses in your budget, such as food, toys, and veterinarian visits.

Seek out resources in the area for pet owners.

Many resources are available for pet owners living in their cars, such as pet shelters, animal welfare organizations, and pet-friendly businesses. 

My Opinion

Research the available resources and take advantage of them if needed. Some organizations may offer discounted or free services for pet owners in need.

Living in a car with a dog can be challenging, but it can also be a rewarding experience. It requires preparation, patience, and a positive attitude. 

With the right mindset and resources, you can create a safe and comfortable space for yourself and your furry friend.

It is important to note that living in a car with a dog should only be done as a last resort. 

See alternative housing options that provide a more stable and permanent living situation for you and your pet. I hope you have learned how to live in your car with a dog.

How to Make a Car Bow | Step-by-Step Guide: DIY Tutorial

0

If you will surprise someone by giving them a car, then I suggest you bow your car. Suppose you don’t know how to car bow. Then there is no need to worry about it.

I am here to assist you after going through this blog post. You will be able to bow your car without anyone’s assistance.

I will discuss these points which you have to follow while car bowing.

  • Gather Supplies – ribbon, scissors, tape, and a foam wreath form
  • Cut the length of the ribbon – measure the circumference of the wreath form and cut the length of the ribbon accordingly
  • Create the loop – make a loop with the ribbon, and make sure to leave enough slack for the bow
  • Twist the loop – twist the ribbon loop and make it secure with tape
  • Create the base – make the base of the bow by tying the ribbon around the wreath form in a bow shape
  • Create the bow center – make the center of the bow by tying the ribbon around the wreath form in a bow shape
  • Secure the bow – attach the bow to the car with tape
  • Finishing touches – add decorations such as flowers or ribbons to make your bow stand out.

How to Make a Car Bow

Gather Supplies

The first step in making a ribbon bow for your car is gathering all the necessary supplies. 

Supplies Needed:

Supplies Needed
  • Ribbon (your choice of color and material)
  • Scissors
  • Tape
  • Foam wreath form 

The ribbon can be of any color and material, depending on the occasion or event you’re celebrating.

Cut the Length of the Ribbon

The second step is to measure the circumference of the wreath form and cut the length of the ribbon accordingly. 

Cut the Length of the Ribbon

You can use a measuring tape to get the exact length you need. It’s important to ensure you have enough ribbon to create the bow, tails, and loops.

Cut the Length of the Ribbon

To make a ribbon, you have to:

  • Draw a rectangle at the end of 1 side. As shown in picture 1.
  • Then trace the triangle with scissors. It should look like picture 2.
  • Make another ribbon like it.
  • After that, pour the glue gun into one end of the ribbon. As shown in picture 3.
  • Then attach a ribbon to it. As shown in picture 4.

Create the Loop

Create the Loop

The third step is to create the loop of the ribbon. Make a loop with the ribbon, and leave enough slack for the bow. 

You can adjust the size of the loop according to your preference. But I am cutting my loop with the size of (4×22). You have to cut 8 loops. All loops should be equal, as shown in Picture 2.

Twist the Loop

Twist the Loop

The fourth step is to twist the ribbon loop and secure it with tape, as shown in the picture above.

You can add a twist tie or wire to make it more secure.

You have to use a glue gun after twisting it, as shown in picture 2. If you don’t have a glue gun, you can use another glue, but it should be a strong adhesive.

Then join 2 of them together, as did in picture 3.

Create the Base

Create the Base

The fifth step is to make the base of the bow by tying the ribbon around the wreath form in a bow shape. Make sure the bow is centered on the wreath form. All you have to do is:

  • You have to pour glue in the center of the loop and then attach it, as shown in picture 1. 
  • Start attaching them in different dimensions.
  • Then gently press that area to stick it properly. As shown in picture 2.
  • Pour, attach, and press until you get the shape shown in Picture 3.

Create the Bow Center

Create the Bow Center

The sixth step is to make the center of the bow by tying the ribbon around the wreath form in a bow shape. Make sure it is centered on the base of the bow.

Attach the ribbon 

Attach the ribbon 

As shown in the above picture, you must pour glue on the ribbon and then attach it with a base loop.

Then attach it back to your bow base.

Secure the Bow

Secure the Bow

The seven-step is to attach the bow to the car with tape. You can place it on the hood, roof, or back of the car. Make sure it’s secure and won’t fall off while driving.

Finishing Touches

Finishing Touches

The eighth and final step is to add decorations, such as flowers or ribbons, to make your bow stand out. You can also use a hot glue gun to attach additional decorations. Be creative and have fun with it!

Read More: How to Prove Someone Vandalized Your Car

My Opinion

Suppose you want to do something new for someone. Then, bow your car. You can do it in half-hour easily.

First, you must grab the abovementioned necessities and follow the abovementioned steps.

If you are trying to surprise someone with a bow car, then trust me, you will get success in it.

How to Jump a Car Picture | Step-by-Step Guide with Pictures

0

If your car doesn’t start, its battery gets dead. Then you have to jump into a car. No, don’t take tension. You can do it by just following a few steps. I will discuss the full procedure for jumping a car with another car. After going through this blog post, you will be much more acknowledged. Let’s see how to jump a car picture.

Here is the list of steps that I will discuss and suggest.

  • Gather Supplies – List of supplies needed and safety precautions.
  • Position the Vehicles – Description of how to position the vehicles for the jump start
  • Connect the Jumper Cables – Directions on how to connect the jumper cables correctly
  • Start the Working Vehicle – Explanation of how to start the working vehicle
  • Start the Dead Vehicle – Instructions on how to start the dead vehicle
  • Let the Vehicle Rest – Highlights because the vehicle should be allowed to rest after the jump start
  • Disconnect the Jumper Cables – Detailed explanation on how to safely disconnect the jumper cables

How to Jump a Car Picture

Gather Supplies: 

Gather Supplies

Before starting the jump-starting process, ensure that you have the jump-starting supplies. List of supplies needed:

  • Jumper cables.
  • Working vehicle.
  • Charged battery. 

It’s important to read the vehicle owner’s manual to know the battery location, terminal types, and specific jump-starting instructions. 

Also, wear protective gear such as:

  • Gloves.
  • Goggles 

Wearing it can protect you against sparks and battery acid.

Position the Vehicles: 

Position the Vehicles

Park both vehicles close enough together so that cables can reach both car batteries. Ensure both vehicles are in park or neutral, and turn off the engines, headlights, and accessories. 

Read More: How to Drive a Car for Beginners

Engage the parking brakes to prevent any vehicle movement.

Connect the Jumper Cables: 

Connect the Jumper Cables

Join the jumper red cable and connect one end to the (+) terminal of the dead car battery. Then, connect the other end of the red cable to the (+) terminal of the charged car battery. Take the black cable and attach one end to the charged battery’s negative (-) terminal. Then, attach the other end of the black cable to a metal part of the dead vehicle’s engine. Make sure the cables are connected in the correct order.

Start the Working Vehicle: 

Start the Working Vehicle

Start the working vehicle and let it idle for a few minutes to charge the dead battery. Do not rev the engine or apply the accelerator pedal during this time. If you did, everything would get ruined.

Just start your car engine. Do nothing instead of it.

Start the Dead Vehicle: Instructions on How to Start the Dead Vehicle

Start the Dead Vehicle: Instructions on How to Start the Dead Vehicle

Attempt to start the dead vehicle by turning the key in the ignition. If the vehicle starts, let it idle for a few minutes. If the vehicle doesn’t start, wait a few more minutes and try again.

Let the Vehicle Rest

Let the Vehicle Rest

Once the dead vehicle starts, let it idle for a few more minutes to recharge the battery fully. You may need to keep the engine running and drive around to prevent the battery from discharging again.

Disconnect the Jumper Cables: 

To disconnect the jumper cables:

Disconnect the Jumper Cables
  • Please start with the black cable, and remove it from the engine block of the dead vehicle.
  • Remove the black cable from the charged battery’s negative (-) terminal.
  • Repeat the same process with the red cable in reverse order, starting with the charged battery’s positive (+) terminal and ending with the dead battery’s positive (+) terminal.

Conclusion

In conclusion, jump-starting a vehicle can be a lifesaver when your battery is dead. Following these simple steps, you can safely and effectively jump-start your vehicle and return to the road. 

Remember always to wear protective gear, position the vehicles correctly, connect the jumper cables in the correct order, and allow the vehicle to rest after the jump-starting process.

This article provides a detailed step-by-step guide on jumping-starting a vehicle safely and effectively. The process involves gathering the necessary supplies, including jumper cables and a working vehicle with a charged battery, and taking the necessary safety precautions, such as wearing protective gear. 

The article also explains how to position the vehicles correctly, connect the jumper cables, and start the working and dead vehicles. 

Additionally, it highlights the importance of allowing the vehicle to rest after the jump-starting process and provides detailed instructions on safely disconnecting the jumper cables. 

Following these simple steps, anyone can jump-start a vehicle and get back on the road quickly and safely. This article is a valuable resource for anyone who may find themselves stranded with a dead battery and needs to jump-start their vehicle. Hope you learn how to jump a car picture.

How to Jump a Car with a Diagram | Visual Guide: [2023 Update]

0

Sometimes, during a long drive battery gets dead. Then you have to jump out with another car. You can do it easily if you know its basics and procedure. Today after going through this blog post, you will be much more confident and aware of it. I will discuss the following listed 9 steps on how to jump a car with a diagram.

  • Safety Precautions
  • Prepare the Jumper Cables
  • Position the cars
  • Connect the Positive Cables
  • Connect the Negative Cables
  • Start the Engine of the Working Vehicle
  • Start the Engine of the Dead Vehicle
  • Remove the Cables
  • Take the Car for a Test Drive

How to Jump a Car Diagram

Step 1: Safety Precautions

Safety should be your top priority when jumpstarting a car. First, turn off cars and any electrical components, such as the radio, headlights, and interior lights. 

Step 1: Safety Precautions

Wear safety gloves and eye protection to prevent electrical shocks. In addition, avoid smoking or having any flammable materials near the car batteries as they contain hydrogen gas that can be explosive.

Step 2: Prepare the Jumper Cables

Step 2: Prepare the Jumper Cables

Make sure you have the correct set of jumper cables for your car. Check that the cables are clean, untangled, and free of any damage, such as frayed wires or cracked insulation. 

If they are damaged, do not attempt to use them, as it could result in an electrical shock or fire.

Step 3: Position the Cars

Step 3: Position the Cars

Position the working car close to the dead car so the jumper cables can reach both car batteries. Turn off both cars and engage the parking brake. 

Ensure that the cars are not touching each other. If they touch each other, they can get a spark.

Step 4: Connect the Positive Cables

Step 4: Connect the Positive Cables

Join one end of the RED JUMPER CABLE to the (+) terminal of the dead car battery. Then, join the other end of the RED JUMPER CABLE to the (+) terminal of the working car battery.

Ensure that the cables are securely attached to both batteries. Otherwise, it will need to be fixed.

Step 5: Connect the Negative Cables

Step 5: Connect the Negative Cables

Connect one end of the BLACK JUMPER CABLE to the (-) terminal of the working car battery. Then, join the JUMPER BLACK CABLE to a metal surface. They should be joined properly.

This could be a metal bracket, bolt on the engine block, or another suitable location.

Step 6: Start the Engine of the Working Vehicle

Step 6: Start the Engine of the Working Vehicle

Start the working car’s engine and let it idle for a few minutes to allow the battery to charge the dead car battery. The working car’s alternator will provide the power to charge the Dead car battery. 

One person should sit in the working car and start the engine for this step. At the same time, others should monitor it from outside, as shown in the above picture.

Step 7: Start the Engine of the Dead Vehicle

Step 7: Start the Engine of the Dead Vehicle

Try to start the engine of the dead car. If it doesn’t start, wait a few more minutes for the battery to charge. If the car still doesn’t start after several attempts, it may be a sign that the battery is too old and needs to be replaced.

Step 8: Remove the Cables

Step 8: Remove the Cables

Once the dead car starts, removing the jumper cables correctly is important to avoid any electrical shocks or sparks.

First, remove the negative cable from the metal surface of the dead car. Next, remove the negative cable from the working car battery. Then, remove the positive cable from the working car battery and the positive cable from the dead car battery.

Step 9: Take the Car for a Test Drive

Step 9: Take the Car for a Test Drive

Take the car for a short test drive to ensure the battery is charged and starts and runs smoothly. If the car still has trouble starting or running, it may be a sign of a more serious problem, and you should take it to a mechanic for a professional inspection.

My Opinion

Everyone can face a dead battery issue anytime. But instead of getting panicky, look for a gentleman or lady who will happily agree to jump into your car with their car.

Once you get a car, jump your car. Then Park your dead car and other charged car in a way that gets easily jumped. You can park then opposite their direction but facing toward each other.

After that, connect both of them and follow the above steps.

You should follow the above 9 steps carefully; thus, you can charge your battery. 

Once you are done, remove the cable and start your car to see if it’s working. It will work properly.

How to Get Rid of Rotten Meat Smell in Car | Easy Steps to Eliminate Smell

0

Getting rid of the rotten meat smell in a car can be daunting, but it is not impossible. 

Whether you accidentally left a piece of meat in your car or bought a used car with a lingering meat smell, you can take steps to eliminate the odor. 

Here are some tips on how to get rid of the rotten meat smell in your car:

  • Identify the source of the smell 
  • Clean the car’s interior
  • Remove and replace any fabric or upholstery
  • Vacuum and shampoo the carpets
  • Use odor neutralizers and deodorizers
  • Use a car air purifier
  • Use vinegar and baking soda to absorb odors 
  • Set up an ozone generator
  • Use charcoal bags and baking soda
  • Keep the car windows open 
  • Finish the work

Read More: Why Does My Car’s Air Conditioning Smell Bad

How to Get Rid of Rotten Meat Smell in Car

Identify the Source of the Smell

Identify the Source of the Smell

The first step in getting rid of the rotten meat smell in your car is to identify the source of the smell. 

Check under the seats, in the trunk, and in any other nooks and crannies where the meat might have fallen or been left. Once you have found the source, remove it immediately.

Read More: How to Get Rid of Diesel Smell in Car

Clean the Car’s Interior

Clean the Car's Interior

The next step is to clean the car’s interior thoroughly. Start by removing all the trash, food particles, and debris that may be contributing to the odor. 

Then, wipe down all the surfaces, including the dashboard, door handles, and seats. Use a cleaning solution designed for car interiors to avoid damaging the materials.

Remove and Replace any Fabric or Upholstery.

Remove and Replace any Fabric or Upholstery.

If the odor is still present, you may need to remove and replace any fabric or upholstery that has absorbed the smell. 

This can include seat covers, floor mats, and even headliners. Having a professional clean or replace the upholstery may be more cost-effective.

Vacuum and Shampoo the Carpets

Vacuum and Shampoo the Carpets

Vacuuming and shampooing the carpets is another effective way to remove the odor. 

Use a powerful vacuum cleaner to remove dirt, debris, and particles contributing to the smell. 

Then, use a carpet shampooer to deep clean the carpets and remove any lingering odors.

Use Odor Neutralizers and Deodorizers

Use Odor Neutralizers and Deodorizers

Many odor neutralizers and deodorizers are available to help eliminate the smell. 

These products work by neutralizing the odor molecules, making them less noticeable. 

Spray the product on all the surfaces of the car’s interior and let it dry.

Use a Car Air Purifier

Use a Car Air Purifier

A car air purifier can also help eliminate the odor. These devices work by removing the airborne particles that are causing the smell. 

They are especially effective if you have pets or smoke in your car.

Use Vinegar and Baking Soda to Absorb Odors

Use Vinegar and Baking Soda to Absorb Odors

Vinegar and baking soda are natural odor absorbers that can eliminate the smell. 

Mix equal parts of vinegar and water and spray the solution on the surfaces of the car’s interior. 

Let it sit for some time, then wipe it up. You can also sprinkle baking soda on the carpets and upholstery and let it sit overnight before vacuuming.

Learn More: How to Get Rid of Vinegar Smell in Car

Set up an Ozone Generator

Set up an Ozone Generator

An ozone generator can effectively remove the odor, but it should be used cautiously. Ozone is a powerful oxidant that can be harmful to humans and pets. 

Follow the instructions carefully and ensure the car is unoccupied while the ozone generator runs.

Use Charcoal Bags and Baking Soda

Use Charcoal Bags and Baking Soda

Charcoal bags and baking soda are natural odor absorbers that help eliminate the smell. 

Place charcoal bags and baking soda in different areas of the car’s interior, such as the trunk, the floor, and under the seats. Let them sit for a few days before removing them.

Keep the Car Windows Open

Keep the Car Windows Open

Finally, keeping the car windows open can help circulate fresh air and eliminate odor. Park the car in a sunny area and let it air for a few hours.

Finish the work

Getting rid of the rotten meat smell in your car can take time and effort, but it is possible. 

By following these tips and being persistent, you can eliminate the odor and enjoy a fresh-smelling car once

My Opinion

I would advise getting rid of the rotten meat smell in your car requires identifying the source of the odor and thoroughly cleaning the car’s interior. 

You may also need to remove and replace any fabric or upholstery that has absorbed the smell and vacuum and shampoo the carpets. 

Using odor neutralizers, deodorizers, a car air purifier, vinegar and baking soda, an ozone generator, charcoal bags, and baking soda, and keeping the car windows open can eliminate the odor. 

Following these steps, you can successfully remove the rotten meat smell from your car and enjoy a fresh-smelling vehicle.