How to Draw an Easy Race Car | Rev Up Your Art Skills in Minutes

0

Artists want to draw a race car when they think of something exciting and popular. If you know the steps, drawing a racing car is not a big issue.

After going through this blog post, you will get ideas and tips to draw a race car easily.

There are a variety of race cars; first, you have to decide which one you have to draw. After deciding your aim drawing next, you have to

  • Gather the tools and materials needed for the project
  • Learn the basics of drawing cars.
  • Identify the parts of a race car
  • Sketch out the basic shape of the car
  • Add details to the car’s body
  • Draw the Wheels 
  • Draw the Doors 
  • Draw the Lights 
  • Add the interior and engine details
  • Add coloring and shading to the car

Give finishing touches and presentation following to discuss steps below: 

How to Draw an Easy Race Car

Gather the tools and materials needed for the project.

Gather the tools and materials needed for the project.

If you are trying to draw something, then the first step you have to do is to prepare yourself for it.

Likewise, if you start drawing, you must gather all your sketch material and tools in one place.

Learn the basics of drawing cars.

Learn the basics of drawing cars.

After grabbing all your necessities, you must know its basics and rules. 

Basic of drawing:

  • Relationships 
  • Spaces 
  • Edges
  • Light and Shadow 
  • The Whole or Gestalt.

You have to remember these basics while drawing a race car.

Identify the parts of a race car.

Identify the parts of a race car

If you are drawing something, you have to consider it perfectly. You want to examine your race car in each part. So that you will draw it as it should be.

Instead of it, if you know its parts, you can trace your mistakes after drawing a race car.

You can keep your target sketch race car in front of you and draw your sketch according to it.

Sketch out the basic shape of the car.

Sketch out the basic shape of the car.

After going through its basics, you have to start now practical. You have to take your pencil and white paper.

After that, you have to trace out your sketch race car. Understand its outline, then start sketching it as it is.

You have to outline very carefully because it will represent all cars.

Add details to the car’s side mirror.

Add details to the car's side mirror

You must draw the side mirror for details in your sketch race car.

As shown in the above picture, you can draw a rectangle shape.

Draw the window

Draw the window

Next, you have to draw its window. You can do it easily by:

  • Extend your line horizontally, as shown in picture 1.
  • Now, draw another line upward to the first line. As an upper shape of a triangle, as shown in picture 2.
  • Here, your sketch car windows are drawn.

Draw the Doors

Draw the Doors

After drawing a window, you should draw its door. You can draw it by following follow steps:

  • First, you have to draw a vertical line. As shown in picture 1.
  • Then you must draw a horizontal line attached to the end of 1 line. As shown in picture 2.
  • Now again, draw a vertical line. But it should be curved and unjointed. As shown in picture 3.
  • Now extend 1 little curved line from the last line. As shown in picture 4.
  • Now extend this line to the window. As shown in picture 5.
  • Here your door is drawn.

Draw the Wheels 

Draw the Wheels 

Now move towards the wheels. For drawing wheels, all you have to do is:

  • First, you have to draw a circle. As shown in picture 1.
  • Draw a second circle inside of the first circle. As shown in picture 2.
  • Draw a third circle inside of the second circle. As shown in picture 3.
  • Now extend 2 vertical lines but curve from the end. As shown in picture 4.
  • Draw 2 more lines. As shown in picture 5.
  • Draw 2 more same lines from different sides. As shown in picture 6.
  • Do the same for drawing the back wheel.

Add details

Add details

For a realistic look. You have to add some details. You can do it by:

  • Draw 1 curve line from the window. As shown in picture 1.
  • Draw 1 horizontal and then vertical from the end. As shown in picture 2.
  • Then draw 1 mini circle inside a 1 curve line from the window. As shown in picture 3.
  • Draw semi-circles, then join two squares on the circle. As shown in picture 4.

Draw the Lights 

Draw the Lights 

Now you should draw back and front lights. For this, you have to:

  • Draw a curved rectangle, as shown in picture 1. It will be the front light.
  • Draw a semi-circle on the back of the car. Then mark the curve line inside it, as shown in picture 2. It will be backlighted.
  • Here your car lights are drawn.

Add coloring and shading to the car.

Add coloring and shading to the car.

After going through all these steps, you are done. Now you can shade your sketch, or you can give color to your sketch.

You can take your pencil out and bend it on the area of the wheel; after that, move gradually forth and backward. It will look as in the above picture. 

Add coloring and shading to the car.

Instead of it, you can also add your favorite color. You can give dark or light colors to your sketch. I will go with orange color.

After adding color, my sketch car will look like the above picture.

Frequently Asked Questions

What materials do I need to draw an easy race car?

To draw an easy race car, you will need a pencil, an eraser, a ruler or straight edge, and a piece of paper. Optionally, you can use colored pencils, markers, or crayons to add color to your drawing once the sketch is complete.

How can I make my race car drawing more realistic?

To make your race car drawing more realistic, you can:

  1. Use reference images: Look up photos of real race cars to better understand their proportions and details.
  2. Add shading: Shade your drawing to create depth and make the car appear three-dimensional.
  3. Include finer details: Add small details like lug nuts, exhaust pipes, and intricate decal designs to enhance the overall appearance of your race car.
  4. Practice perspective: Learn the basics of perspective drawing to give your race car a more dynamic and realistic look. This will help make the car appear as if it’s on a track or in motion.

Expert Opinion

Most of the world like racing cars in all models of cars. They want to draw it. But they hesitate with a thought of how they can draw.

It’s just a piece of cake when you get it. All you have to do is grab your all-sketching material and tools, then go to the peaceful area. 

Keep your target sketch car before you, then start drawing it. You can get help from my above mention steps and strategies.

Drawing a race car can relieve depression and make you feel happy.

How to Draw a Car Crash | Draw a Realistic Car Crash Scene

0

Drawing a car crash can be a challenging and rewarding experience for any artist. This guide will take you through how to draw a car crash.

Whether you’re creating a piece of art or an illustration for a story or graphic novel, drawing a car crash requires a keen understanding of composition, perspective, and the anatomy of vehicles. 

  • Gather reference images
  • Sketch the car crash scene
  • Draw the car crash
  • Choose the right colors and textures
  • Add shadows and highlights
  • Add details to the car crash
  • Use depth and perspective
  • Create the background
  • Make the final adjustments
  • Give finishing the drawing

How to Draw a Car Crash

Step 1: Gather Reference Images

Gather Reference Images

Before starting your car crash drawing, gathering reference images is important. 

Look for photos of real car crashes or reference images of cars in motion to better understand how the vehicles move and deform during an accident. 

You can also use online resources or reference books to gather images that will help you create a realistic car crash scene.

Step 2: Sketch the Car Crash Scene

The next step is to sketch out the car crash scene. Use a pencil to create a rough outline of the vehicles and the environment in which the crash occurs. 

Consider the angle and direction of the vehicles, and pay attention to the perspective and composition of the drawing.

All you have to do is see one by one following the pictures. After that, start sketching like them on your white paper.

Sketch the Car Crash Scene

Step 3: Draw the Car Crash

Draw the Car Crash

Once you have your sketch, you can start to draw the car crash. Use a pen or a marker to define the shapes of the vehicles and their parts. 

Don’t worry too much about the details at this point. Instead, focus on the overall shape and form of the cars, the crumple zones, and the impact points.

Step 4: Choose the Right Colors and Textures

When you’re happy with the overall shape of the car crash, you can start to add color and texture to the drawing. 

Choose appropriate colors for the scene and the mood you want to convey. You can also experiment with different textures to add depth and interest to the drawing.

Step 5: Add Shadows and Highlights

Add Shadows and Highlights

Shadows and highlights are essential in giving your car crash drawing a sense of depth and realism. 

Study the reference images you gathered earlier and consider where the light source comes from. 

Use a light source to create the highlights and shadows on the vehicles and the surrounding environment.

Step 6: Add Details to the Car Crash

Add Details to the Car Crash

The devil is in the details; adding small details to your car crash drawing can make all the difference.

Add scratches, dents, and broken glass to the vehicles, and pay attention to the details of the environment, such as skid marks on the road or debris scattered around the scene.

Step 7: Use Depth and Perspective

Use Depth and Perspective

Use depth and perspective to create space in your car crash drawing. 

Pay attention to the relative size of the vehicles and the environment, and use shading and lines to create the illusion of depth and distance.

Step 8: Create the Background

Create the Background

A well-drawn background can add depth and interest to your car crash drawing. 

Use the reference images you gathered to create a realistic background that complements the car crash scene.

Step 9: Make the Final Adjustments

Take a step back and assess your car crash drawing. Make any final composition, shading, or color adjustments as needed.

Step 10: Give Finishing Touches to the Drawing

Give Finishing Touches to the Drawing

Once you’re happy with your car crash drawing, add any finishing touches, such as a signature or a frame.

My Opinion

This article provides a step-by-step guide on how to draw a car crash. The first step is to gather reference images to ensure accuracy and realism in the drawing. 

Sketching the car crash scene comes next, using a pencil to create a rough outline of the vehicles and environment and experimenting with different angles and compositions. 

The actual drawing of the car crash follows, using a pen or marker to define the shapes of the vehicles and their parts. The artist should pay attention to the anatomy of vehicles, such as the crumple zones and impact points.

Choosing the right colors and textures is important; adding shadows and highlights can help bring the drawing to life. 

Include details such as debris, depth, and perspective.

The artist should create a background to complete the scene and make final adjustments.

Overall, drawing a car crash requires a keen understanding of composition, perspective, and the anatomy of vehicles. Following these steps, an artist can create a realistic and impactful depiction of a car crash.

How to Draw a Classic Car | Step-by-Step Guide with Images

0

Drawing a classic car is fun and rewarding for car enthusiasts and artists. You can do it easily for an hour, whether your goal is to capture a vintage car’s beauty and elegance or enjoy drawing cars. This blog post will guide you step-by-step and show you how to draw a classic car in just a few easy steps.

These are steps that I am going to discuss briefly:

  • Prepping the canvas – materials needed, setting up the workspace
  • Sketch the outline – creating the shape of the car
  • Add details – windows, tires, headlights
  • Shade and highlights – creating the 3D effect
  • Add color – choosing the right colors for the classic car
  • Taking it to the next level – adding reflections, highlights, and shadows
  • Finishing touches – adding the details to make it look realistic
  • Finishing up – erasing any mistakes, touching up any areas

How to Draw a Classic Car

Prepping the Canvas

Before drawing your classic car, gather materials and set up your workspace. You will need a 

  • sketchbook
  • drawing paper
  • a pencil
  • an eraser
  • colored pencils 
  • markers.

Once your materials are ready, find a comfortable and well-lit space to work in. Ensure you have enough room to spread your materials and move your hand freely.

Sketch the Outline

Sketch the Outline

Start by sketching the outline of the car using light and gentle strokes. 

You can use the above images to get the car’s shape just right. Pay attention to the proportions and angles of the car, as these will determine the overall look and feel of your drawing.

Add Details

Add Details
  • You have to extend the line. As shown in picture 1.
  • Draw a square; thus, it will look into the front mirror. As shown in picture 2.
Add Details
  • Draw a circle; then, draw a circle inside the first circle again. 
  • Draw a horizontal line inside the second circle. It will look at headlights. As shown in picture 3.
  • Repeat the step and draw the second headlight. As shown in picture 4.
Add Details
  • Draw a square but curve from the sides. Draw 2 more squares, but their fourth side should be the same, as shown in picture 5.
  • Draw Criss cross lines inside the last square, then fill it with a pencil, as shown in picture 6. 
Add Details
  • Draw a circle in the tire place of your sketch car, as shown in picture 7.
  • Draw another circle inside of the first circle. As shown in picture 8.
  • Draw mini semi-circles in the last. As shown in picture 9.

Once you have the basic outline of the car, start adding details such as the windows, tires, and headlights. 

Use the above images to help you get the details just right. Take time and work slowly to capture the classic car’s look and feel accurate.

Shade and Highlights

Shade and Highlights

Next, start adding shade and highlights to create a 3D effect. Use a darker pencil or marker to shade the areas of the car that are in shadow and a lighter pencil or marker to add highlights to the areas that are catching the light.

Add Color

Add Color

Once you have shaded and highlighted your classic car, it’s time to add color. 

Choose colors that are appropriate for the era of the car and that match the reference images you are using. 

Use light and gentle strokes to build up the colors gradually, and make sure to blend the colors for a smooth finish.

Finishing Touches

Finishing Touches

To finish your classic car drawing, add any final details to make it look more realistic. 

This could include exhaust pipes, door handles, or other small details that make the car look complete.

Finishing Up

Once you are happy with your classic car drawing, it’s time to erase any mistakes and touch up any needed areas. 

Finishing Up

Use an eraser to remove stray pencil marks or smudges and a pencil or marker to add final details.

Drawing a classic car may seem daunting at first, but with some practice and patience, you can create a beautiful and detailed drawing that captures the essence of these vintage vehicles. 

So, gather your materials, find a comfortable workspace, and start drawing your classic car today!

Learn More: How to Draw a Car from the Back

Taking it to the Next Level

Consider adding reflections, highlights, and shadows to make your classic car drawing pop. These details will give your drawing a more realistic and polished look. 

Use a light pencil or marker to add highlights and reflections and a darker pencil or marker to add shadows.

Expert Opinion

This article provides a step-by-step guide on how to draw a classic car. The article covers prepping the canvas, sketching the outline, adding details, shading and highlighting, adding color, taking it to the next level, finishing touches, and finishing up.

The guide provides tips for creating a realistic and polished drawing of a classic car, including paying attention to proportions and angles, adding reflections, highlights, and shadows, erasing mistakes, and touching up any areas.

With practice and patience, anyone can create a beautiful and detailed drawing of a classic car that captures the essence of these vintage vehicles.

How to Decorate Car Interior | 12 Steps None Told You Before

0

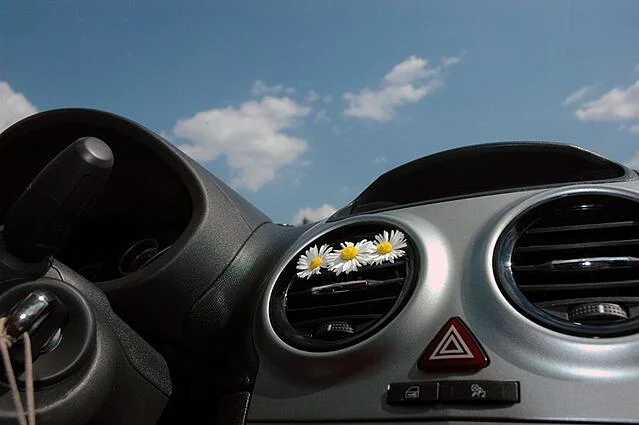
If you love expressing your personality through your car, decorating the interior can be fun and exciting. Not only does it add a personal touch, but it can also make your car feel like a more welcoming and comfortable space. Here I will provide a step-by-step guide on how to decorate car interior. You need to follow me.

I am going to discuss the steps briefly:

  • Identifying your style: Choose the right colors and materials
  • Clean and prepare the interior: Prepare the interior for the decorations
  • Clean and remove old materials – Remove old upholstery, carpet, and foam.
  • Measure the interior: Measure the interior of the car to ensure the decorations fit
  • Choose the decorations: Select the decorations that fit with the style and size of the car interior
  • Purchase the decorations: Buy the decorations needed for the car interior
  • Install the decorations: Securely install the decorations in the car interior
  • Create a unique look: Put together the decorations to create a unique look
  • Add lighting: Install lighting to enhance the look of the car interior
  • Add a personal touch: Add a personal touch with accessories
  • Seal the interior – Paint or seal the interior to protect it from dirt and moisture.
  • Enjoy your car interior: Enjoy and show off your new car interior!

How to Decorate Car Interior

Identifying Your Style

Identifying Your Style

Before starting, it’s essential to identify your style. Choose colors and materials that match your taste, whether sleek and modern or retro and colorful. 

Consider the purpose of the car and its use to help determine the appropriate style.

Clean and Prepare the Interior

Clean and Prepare the Interior

The first step is to clean and prepare the car’s interior for decoration. 

Remove all items and clean thoroughly to create a blank canvas. Ensure that the car is free from dust, dirt, and debris.

Clean and Remove Old Materials

Clean and Remove Old Materials

If your car has old upholstery, carpet, or foam that needs to be removed, now is the time to do it. 

Take out any old materials to make way for new decorations.

Measure the Interior

Measure the Interior

Measure the interior of the car to ensure that the decorations fit correctly. Take accurate measurements of the seats, dashboard, doors, and other areas you plan to decorate.

Choose the Decorations

Choose the Decorations

Choose the decorations that match your style and the size of the car interior. 

You can add seat covers, floor mats, steering wheel covers, dashboard trims, and other decorative items.

Purchase the Decorations

Purchase the Decorations

Purchase the decorations that you have chosen for the car interior. Make sure you have all the necessary items and tools needed for installation.

Install the Decorations

Install the Decorations

Start by installing the decorations in the car interior. Follow the instructions carefully, and make sure the items are installed securely and safely.

Create a Unique Look

Create a Unique Look

Create a unique look by arranging the decorations to reflect your style. Experiment with different colors and patterns to create a unique and personalized look.

Add Lighting

Add Lighting

Install lighting to enhance the look of the car interior. Consider adding LED lights to the interior, creating an ambient atmosphere and making your car stand out.

To enhance the look of the car interior, consider adding lighting. You can install LED lights to create an ambient atmosphere and make your car stand out. 

Additionally, you can add a personal touch with accessories such as air fresheners, stickers, and other decorative items that reflect your personality.

Add a Personal Touch

Add a personal touch with accessories such as air fresheners, stickers, and other decorative items that reflect your personality.

Seal the Interior: Paint or Seal the Interior to Protect it from Dirt and Moisture.

Seal the car’s interior by painting or sealing it to protect it from dirt and moisture. This will keep the decorations intact and extend their lifespan.

To protect the decorations and maintain the new look, seal the car’s interior by painting or sealing it. This will protect it from dirt and moisture, keeping the decorations intact and extending their lifespan.

Enjoy Your Car Interior

After all the hard work, it’s time to enjoy your new car interior! Show it to your friends and family, and take pride in your personalized car space.

Expert Opinion

Decorating your car interior can be a fun and exciting project that allows you to express your personality and create a more welcoming and comfortable space. 

Following these steps, you can create a unique look that reflects your style and enhances the driving experience. It’s a worthwhile investment you’ll enjoy whenever you get behind the wheel.

This article provides a step-by-step guide on how to decorate your car interior. It starts with identifying your style, cleaning, and preparing the interior for decorations. 

The article then explains how to choose the right decorations, measure the interior, purchase the necessary items, and securely install them. It also provides tips on creating a unique look, adding lighting, and adding a personal touch with accessories. 

The article concludes by emphasizing the benefits of decorating your car interior, including personalization and creating a more comfortable and welcoming space.

To protect the decorations and maintain the new look, seal the car’s interior by painting or sealing it. This will protect it from dirt and moisture, keeping the decorations intact and extending their lifespan.

Decorating your car interior can be a fun and exciting project that allows you to express your personality and create a more welcoming and comfortable space.

6 Steps to Connect Car Equalizer to Amplifier Diagram

0

Adding an equalizer to your car stereo system can enhance the sound quality by allowing you to fine-tune the frequencies. However, to make it work, properly connect the car equalizer to the amplifier. In this article, we will walk you through how to connect car equalizer to amplifier diagram.

  • Install the Equalizer and Amplifier
  • Connect the Equalizer and Amplifier
  • Connect the Equalizer to Your Car Stereo
  • Connect the Amplifier to Your Car Stereo
  • Connect the Equalizer to the Amplifier
  • Connect the Ground Wire to Both the Equalizer and Amplifier

How to Connect Car Equalizer to Amplifier Diagram

Step 1: Install the Equalizer and Amplifier

Install the Equalizer and Amplifier

Before you begin, ensure you have all the necessary equipment, including an equalizer, an amplifier, speaker wires, power wires, and RCA cables. 

Once you have all the equipment, install the equalizer and amplifier in your car. 

You can mount them under the seat, in the trunk, or any other suitable location. Ensure that the installation is secure and stable to avoid any potential damage.

Step 2: Connect the Equalizer and Amplifier

Connect the Equalizer and Amplifier

Next, you need to connect the equalizer and amplifier using RCA cables. 

Connect one end of the RCA cable to the equalizer’s output jack and the other end to the amplifier’s input jack. 

Make sure to use high-quality RCA cables to ensure the best sound quality.

Step 3: Connect the Equalizer to Your Car Stereo

Connect the Equalizer to Your Car Stereo

Connect the equalizer to your car stereo using another RCA cable set. 

Connect one end of the RCA cable to the equalizer’s input jack and the other end to the car stereo’s output jack. 

Ensure you have the correct input and output jacks; connecting them incorrectly can result in poor sound quality.

Step 4: Connect the Amplifier to Your Car Stereo

Connect the Amplifier to Your Car Stereo

After connecting the equalizer to your car stereo, you need to connect the amplifier to your car stereo. 

Use speaker wires to connect the amplifier’s output terminals to the speaker terminals on your car stereo. 

Ensure the polarity is correct, with the positive (+) and negative (-) wires correctly connected.

Step 5: Connect the Equalizer to the Amplifier

Connect the Equalizer to the Amplifier

Now, connect the equalizer to the amplifier using another set of RCA cables. 

Connect one end of the RCA cable to the equalizer’s output jack and the other end to the amplifier’s input jack. 

Ensure that you connect the cables to the correct input and output jacks.

Step 6: Connect the Ground Wire to Both the Equalizer and Amplifier

Connect the Ground Wire to Both the Equalizer and Amplifier

Finally, connect the ground wire to both the equalizer and amplifier. Connect the wire to a clean, bare metal surface on your car’s chassis to ensure proper grounding.

Expert Opinion

Connecting a car equalizer to an amplifier can seem daunting at first, but you can do it easily by following these steps. Double-check all connections and ensure you have the correct input and output jacks. You can enjoy a high-quality sound system in your car by properly connecting the car equalizer to the amplifier.