How to Decorate a Car for a Wedding | 17 Simple Steps

0

Weddings are wonderful, but they’re even better when everyone gets to share on one of their most joyous occasions. There’s a good probability that if you’ve ever attended one of these events, you’ve seen a decorated car at least once. One coolest and most entertaining thing you can do to express your appreciation for the special day is to decorate your car like people have a tradition of doing when they arrive for a wedding event. This article provides helpful insight into how to make a wedding car look special for the big day.

How to Decorate a Car for a Wedding

Here are the steps to decorate a car for a wedding

  • Select the car for decoration
  • Create a design plan
  • Choose the decorations
  • Assess the car’s size and shape
  • Prepare the car for decoration
  • Gather supplies such as fabric, ribbons, streamers, balloons, and signs
  • Decorate the car with the chosen materials
  • Attach the decorations securely
  • Clean the car thoroughly
  • Secure the decorations to the car
  • Decorate the car with fabric, ribbons, and streamers
  • Add balloons and signs to the car
  • Adding lighting and accessories
  • Secure the decorations with tape or glue
  • Test the decorations for security
  • Take photos of the car before and after the wedding
  • Have fun and enjoy the decorated car!

Select the car for decoration.

There are a few elements to take into consideration while choosing a vehicle for your wedding’s decor:

Select the car for decoration

Size and Capacity – Verify the vehicle’s size and capacity to accommodate the wedding party, including the bride and groom, bridesmaids, groomsmen, and any other VIPs riding along.

Style: Consider your wedding’s general pattern and appearance. A sleek, modern vehicle could be more appropriate for a social event, while a vintage car might be ideal for a traditional, classic wedding.

Status – Confirm that the vehicle is in good shape and properly maintained. You don’t want your big day to be ruined by technical issues.

Price – When choosing a vehicle, consider your budget. Several rental firms provide various car models at various pricing points.

Create a design plan.

Create a design plan by following these steps to decorate a car for a wedding:

Create a design plan
  • Select the wedding’s style and color palette. You may choose the appropriate automobile decorations with the aid of this.
  • Compile your resources. Ribbons, flowers, streamers, and other ornamental goods are things you’ll need.
  • Create a layout. Consider where you want to place each ornament and how it will appear from various angles.
  • Draw an image of the car’s interior using a computer program or a paper sketch of your concept.
  • Create a list of all the required supplies, including their sizes and types.

Choose the decorations

Choose the decorations

Select decorations that blend in with the event’s overall design. Ensure the decorations are properly fixed so they do not come loose while the car is driving and do not hinder the driver’s or passenger’s vision.

Consider the brand and type of vehicle, as well as its overall appearance, while choosing decorations. Select wedding decorations that reflect your style and make you feel special.

Access the car’s size and shape.

Access the car size and shape

Measure the car’s length, breadth, and height with tape. This will make it easier for you to decide what size decor would work in your available area. Observe the car’s curves and shapes from all sides to gain a sense of the car’s curves and shapes. This will make it easier to picture how and where the decorations will fit best on the vehicle.

Ensure the decorations are properly fixed so they do not come loose while the car is driving and do not hinder the driver’s or passenger’s vision.

Take photos of the car before and after the wedding

Take photos of the car before and after the wedding

Remember to get vehicle images from several perspectives, including the front, rear, sides, and top. You can use this as a guide when organizing your decorations. You may capture this priceless moment on camera to save it in your memory.

Gather supplies such as fabric, ribbons, streamers, balloons, and signs

Gather supplies such as fabric, ribbons, streamers, balloons, and signs

List all the supplies you will require. Materials like cloth, ribbons, streamers, balloons, and placards are frequently used to decorate wedding cars. To get the required goods, shop online or go to a craft or party supply store.

Decorate the car with fabric, ribbons, and streamers.

Decorate the car with fabric, ribbons, and streamers

You may also use items you already have around the house, such as vases or pots, or materials you can locate, like cloth or ribbon from a former occasion. Consider its size and shape when decorating the vehicle with cloth and garlands. Make sure that any decorations are fastened so that they do not come off while driving and do not hinder the driver’s or other passengers’ vision.

Clean the car thoroughly.

Clean the car thoroughly

Clean off any dirt or debris from the car’s exterior with the hose. Start at the top of the car’s exterior and work your way down, scrubbing with the sponge and a pail of soapy water. To prevent leaving a residue, rinse the soap off as you go. To dry the vehicle, use a microfiber towel or chamois. Dry it well to prevent water stains. Use a glass cleaner and a microfiber cloth to clean the windows inside and outside.

Add balloons and signs to the car.

Add balloons and signs to the car.

Use a balloon blower or your breath to fill the balloons properly. Use twine or ribbon for the balloons to be attached to the car’s exterior. The car’s sides, back bumper, or front bumper are all suitable locations for them. Stick the signage to the car using masking tape or double-sided tape. The windows, doors, or trunk may all accommodate them.

Test the decorations for Security.

Add balloons and signs to the car.

Take the vehicle for a test drive to observe how the balloons and moving banners appear. For the big day, make any required alterations.

Have fun and enjoy the decorated car.

Have fun and enjoy the decorated car

You can decorate the vehicle more quickly with a few additional hands if you enlist the assistance of friends or family. Decorating the car may be enjoyable.

Consider window decorations

Consider window decorations

Window vinyl stickers are developed specifically for people with mild tastes who wish to make their vehicles look minimalist. These are self-adhesive and often constructed of vinyl that is waterproof. They are conveniently offered in both physical and online businesses. Naturally, you can also ask them to weigh it.

Pick flowers

Pick flowers

Satin bows are ideal for creating a refined and attractive appearance. You may tie them anyplace in your car or make them into tiny ribbons and scatter them around for a chic appearance. You could even glue a miniature flower to add a little extra flair to the ribbon. For best results, always get broad tapes.

Use banners and posters.

Use banners and posters.

You don’t need to attach a blank 8.5 x 11-inch sheet of paper bearing the names of the couples tying the knot. It. Pick up the “Got Married” banner or customize it with your and your spouse’s names.

Make it a nice occasion.

Make it a nice occasion.

At some weddings, it’s impossible to avoid flowers. And decorating the wedding vehicle with it is a fantastic idea. To avoid overfilling your car, though, you must be careful. Flower arrangements placed on the hood or back of the car are one of the nicest methods to beautify the wedding vehicle. By artistically arranging one flower, you can fill the whole of your car.

Maintain the wedding’s style.

Maintain the wedding's style.

You may always play it safe and dress your car up with a touch of elegance if you’re having difficulty choosing the color of the flowers or ribbons. Choose roses, streamers, or a combination of the elements described above in colors that match the design of your wedding decor; for instance, if purple is the color scheme.

Tips on Personalizing Your Wedding Vehicle

The mode of transportation looks lovely with wedding vehicle décor.

The ribbons are primarily used to decorate wedding vehicles, and the white ones are used for decoration. You can decorate your wedding car yourself if you follow these tips. It looks fashionable and is also reasonably priced. Such ribbons can be purchased, and your friends or family can help you design your car with them. You can research the idea on the internet.

Tips on Personalizing your Wedding Vehicle

Another traditional and significantly less expensive option is to decorate the wedding cars with flowers. You may spruce up your car with floral arrangements and put these on over the handles. You could hang a sizable bouquet or wreath from the hood. 

Tips on Personalizing your Wedding Vehicle

Additionally, you can add flowery wreaths or stripes to the car’s top. Flowers can be placed in the back of a bouquet. A variety of accessories and centerpieces are also available for selection. For instance, you might use figurines of a cupid or a dove and attach them to the bonnet or install thermo-molded decorations on top of the vehicle.

Tips on Personalizing your Wedding Vehicle

Using custom-made window decals or stickers designed for couples. These are typically constructed of waterproof vinyl and include glue. They can be discovered online or at nearby businesses.

Use a banner or poster. You can purchase magnetic signage or banners that adhere to the exterior of your car. You can choose “Newly Married” signs or make them your own. Mostly on the back of your vehicle, you can also display posters.

Tips on Personalizing your Wedding Vehicle

You also can ask your relatives and friends for any extra decorations they may have. You must, however, keep in mind that these suit your wedding’s theme.

Tips on Personalizing your Wedding Vehicle

Frequently Asked Questions

How are wedding car bow ties made?

Cut pieces of ribbon 2 to 3 inches wide into lengths ranging from 3 to 8 feet long for car window decorations. A 6-inch section of the tape should protrude toward the vehicle as you place them over the edge of the open windows. Windows should be rolled up so that the tape can be secured by wrapping it around the closed window.

Is there any party car decorating ideas?

Celebrate a birthday with balloons, vapors, and banners. You can add your car to the celebration of someone’s special day when you drive to wish them a happy birthday. Make her birthday memorable by going out with balloons, streamers, window paint, and an amusing banner.

How are some cars decorated?

For a beautiful and classic appearance, dress up the trunk of your vehicle with flower ornaments or lace materials. Pair a laser-cut gold board with eucalyptus tassels or streamers for a casual look. Wreaths, vibrant roses, and bows are enjoyable and give your car a colorful appearance.

Which car Colour is best for a wedding?

There is no definitive “best” color for a wedding car, as it largely depends on personal preferences and the overall theme of the wedding. Some are White, Black, Silver, or Gray: Vintage or Pastel Colors.

Expert Thoughts

An essential consideration is organizing your travel arrangements well before your wedding. If there are many places, you must also consider how you will go from one to the next. Some people prefer to drive a classic car, while others do not. You must reserve it far in advance, whatever it may be. If you drive your vehicle, kindly reserve it for cleaning before the event. 

Resources:

How to Make Seat Covers for Car | 12 DIY Steps

0

Car seat coverings are typically used to provide additional softness or padding to make you comfortable and at ease while driving. Additionally, you can customize your car’s interior while avoiding harming the original fabric by using custom car seats. The cost of purchasing custom covers that precisely fit your automobile seats can be high. But using the correct material and this article as a complete guide, you can sew your car seat covers.

How to Make Seat Covers for Car

Collect necessary materials

  • Elastic (0.5 to 1 inch wide)
  • Clothing fabric,
  • A magic feather
  • Scissors or a fabric cutter
  • A sewing machine
  • Strong needles and thread
  • Rope or twine 

Measure your seats: 

How to Make Seat Covers for Car

Before you start, you’ll need to measure the dimensions of your car seats to ensure that the seat covers will fit properly. Measure each seat’s width, depth, and height, and note any special features, such as headrests or armrests.

Choose your material: 

How to Make Seat Covers for Car

You can use many materials to make seat covers, including cloth, leather, and vinyl. Consider the climate you live in and the level of wear and tear your seat covers will be subjected to. Cloth seat covers are generally the most affordable and comfortable option, while leather and vinyl may be more durable but also more expensive.

Create a style for the car seat cover

How to Make Seat Covers for Car

Place a large sheet of paper, such as a newspaper, a clear plastic sheet, a blank sewing pattern, or another large sheet over the car seat so that it hangs over the edges. Use the magic marker to outline the seams in the current vehicle seat upholstery on the paper placed flat against the seat.

Cut the shape out

How to Make Seat Covers for Car

Discard any extra plastic or paper by cutting along the lines you previously created with the scissors. You can use this as a pattern template to create custom car seat covers.

Sew the seat covers:

Sew the seat covers

You’ll need to sew the two pieces together using cloth material to create the final seat cover. Start by sewing the backrest and seat cushion along the sides and bottom edge. Then, attach any additional pieces, such as the headrest or armrest covers. If you’re using leather or vinyl, you can skip this step as the material is already in one piece.

Make fabric cuts using the style:

Make fabric cuts using the style

To create the car seat cover cloth, place the pattern sheet on it. To ensure you have extra fabric to sew the parts together, use the magic marker to draw a line 0.5 inches outside the pattern lines around the design. Then cut the fabric by those lines using scissors or a fabric cutter.

Combine the fabric’s seams with sewing. The fabric’s edges should have a 0.5-inch pattern piece sewn with a needle or sewing machine. If you’re doing this with a thread and a needle, use tight enough stitches so that the car seat cover will endure regular use.

To further tighten the seam, you can even use a cross stitch to complete the stitched edges.

Fasten the elastic

Fasten the elastic

Calculate how much elastic is required to hold the bottom fabric of the car or measure around the seat. About two-thirds of the length you just measured will be required. For instance, if the chair’s sides and front measure 48 inches, you’ll only need roughly 32 inches of elastic.

Place the seat cover on the vehicle.

Place the seat cover on the vehicle

Stretch the elastic portions of the seat cover to fit over the seat and back of your car seat before installing it. After that, use your hands to smooth out any wrinkles in the fabric.

Firmly tighten the seat cover: 

Firmly tighten the seat cover

To maintain the seat cover tightly in place for repeated usage, tie the connecting cords around the rear of the car seat. Even if it takes effort, making your car seat coverings may be incredibly satisfying. After all, anyone may purchase a chair cover, but not many can claim to have made one themselves.

Make any necessary adjustments: 

Make fabric cuts using the style

Once your seat covers are in place, you may need adjustments to ensure a proper fit. For example, you may need to tuck in any excess material or tighten the elastic bands to ensure that the seat covers stay in place.

Repeat the process for all seats: 

If you’re making seat covers for multiple seats, repeat the process for each seat until all of your seats are covered.

How to Get Seat Coverings to Match Firmly

You understand how annoying it may be if you’ve recently had unfastened seat coverings. It slides around, piles up, and makes things more challenging. But if you try to make them fit precisely, the result will make you much happier.

How to Get Seat Coverings to Match Firmly

Here’s how you can do it:

  • Begin by determining the chair’s width at its broadest point. Most chairs are about 18 inches broad, but it’s best to measure to be safe.
  • Create a fabric wrap by cutting a piece twice as wide as your chair and twice as long. For instance, you need a piece of cloth that is 36 inches wide if your chair is 18 inches broad.
  • Fold the fabric so it is twice as long as your chair and 18 inches (45 cm) broad by folding it half lengthwise. As a result, you will have two layers of fabric to deal with.
  • Leave about 1 inch (2.5 cm) of fabric at either end for seam allowance as you sew a seam down the middle of the fabric. For either side of your seat, this separates two compartments.
  • Filling those pockets is the exciting next step. Anything from used pillow stuffing to dried rice or beans (make sure they’re dry) can be used.
  • It’s important to stuff the pockets just enough to make them beautiful and puffy without stuffing them so much that they burst when you sit on them. When you’ve used just the right batting, fill the gaps using a sewing machine or a needle and thread.
Fasten the elastic

Frequently Asked Questions

What kind of fabric are the seat covers made of?

The five fundamental materials are imitation cloth, vinyl, polyester, nylon, and leather. Hybrid materials for seat covers include canvas, ballistic nylon, neoprene, and a few more. However, it’s important to remember that these materials are derived from the five primary components.

How can I improve the fit of my car seat cover?

Tuck the universal seat cover through the edge while holding it taut when connecting the front and back. Where the back and bottom of the chair connect, there ought to be a neat, straight line. After it is fastened, you should place the cover’s bottom piece over the seat’s bottom.

What shade of car seat cover is ideal?

A lovely color that complements your outside will look excellent since you can see a portion of the car seat cover from the windows. You can quickly discover which colors go well together with a convenient color wheel, giving you an excellent idea of the hues to select for your car seat cover.

What material is resistant to seat covers?

Polyester seat covers are inexpensive, resistant, adaptable, and strong enough to withstand damage. They assist in keeping vehicle seats from getting damaged and are available in various colors and styles.

Conclusion

You may enjoy the appearance of your new seats at a quarter of the price once the seat covers are put on. It’s one of the greatest methods to maintain the quality of your seats, increase the comfort and attractiveness of your interior, and keep your car’s market value high.

Expert Opinion

For a simple DIY installation, refer to the installation instructions that came with your car seat covers. Most slipcovers fasten with Velcro or elastic and slide over the chair’s back. It might be necessary to follow a separate installation procedure for custom-made seats for your car.

Resources:

How to Remove Graco Car Seat from Base | Step-by-Step Guide

0

If you own a Graco car seat, you must understand how to detach it from the base. There are several reasons you might want to remove your Graco kid car seat from the base, but it’s vital to remember that many things could go wrong if you don’t do it properly. Read this article if you need help properly removing the car seat from the base.

Overview of Graco Car Seat

You should get a Graco base to safeguard your child with a secure car seat. This piece of equipment fastens to the seat’s base. Collisions do not harm the vehicle seat with other objects. If something happens, the base will take the blow.

The simplicity of installation makes this product beautiful. The complete seat does not have to be removed to fit the base. At most, five minutes are needed to complete the installation. Once it’s set up, you won’t ever have to question if your infant is being adequately safeguarded.

How to Remove Graco Car Seat from Base

The use of a Graco foundation has a few additional advantages. The foundation, for instance, might aid in injury prevention.

The base can help protect your infant from harm. You might need to be aware of all the potential risks your child could encounter while driving. In reality, you may perform many things without even recognizing them.

The threat of getting struck by another car is one of these hazards. Your youngster might get significant injuries in these kinds of incidents. Fortunately, there are things you may do to prevent this scenario. 

How to Remove Graco Car Seat from Base

Lifting on the stroller handle will allow you to detach the base from a Graco car seat. After that, pull it up by pushing the handle in. To release the automobile seat back, you must pull the release lever. After doing so, raise the car seat out of the base.

It’s simple to reattach your Graco baby seat to the base. Adhere to the instructions below.

Align the car seat base’s latches and the front locking bar.

How to Remove Graco Car Seat from Base

Set your Graco seat atop the foundation.

How to Remove Graco Car Seat from Base

Push on the front of the car seat until it snaps into position. Verify that it has been blocked.

How to Remove Graco Car Seat from Base

Ensure the seat is secured by pulling up on the front.

How to Remove Graco Car Seat from Base

Follow the instructions below to remove the lock if necessary.

Step 1: Pull the locking strap after briefly pressing the gray button to release it.

Follow the instructions below to remove the lock if necessary.

Step 2: Firmly press the releasing hinge.

Follow the instructions below to remove the lock if necessary.

Step 3: Insert the hook, raise it, and remove it from the anchor point.

Follow the instructions below to remove the lock if necessary.

Cleaning the vehicle seat’s base

If you have a child, you know how crucial it is to ensure that the car seat they are riding is securely fastened. You must check the car seat to ensure safety, strength, and comfort.

The car seat base may become soiled after just a few usages, something many parents are unaware of. Regularly cleaning the car seat base is the greatest method to keep your child from becoming ill while driving.

When you initially get a new car seat, you should take the old one out and clean it. The directions that came with the basic car seat can also be used as a guide. You can adhere to their recommendations if they advise cleaning the car seat base.

Cleaning the vehicle seat's base

Before putting the vehicle seat back together after cleaning the base, it must dry. You may hang the car seat on a clothesline or use a hair dryer. Either approach will be successful.

When your kid is ready to depart, you should always strap them into the car seat. Once she completes this, the car seat base will no longer be concern.

Frequently Asked Questions

How is the Graco seat belt removed from the base?

To ensure the seat is secured:

  • Lift on the front corners.
  • Pull the vehicle seat out of the frame by lifting the frame release lever on the rear of the seat.
  • Press the red buttons on each side of the handle to adjust it.
  • Before raising the stroller, be certain the handle is securely fastened.

Can I take the seat cover off my car?

The newborn cushion and head protection can be removed as your child develops; typically, this happens between 5 and 6 months. The infant “drops” into the seat when the cushion is removed from under them, allowing them more room to develop.

Which equipment is required to remove vehicle seats?

The individual front seats are secured to the ends of the guides by four bolts. Two bolts go from the front to the back. To remove the seat base, unscrew them. For removal, use a socket wrench.

Do car seat removals have an impact on insurance?

Adding sports or leather seats to your car doesn’t significantly affect your insurance rate, but removing the seats completely does.

Is using the base as a car seat safer?

Bases are seen to be safer since they often remain in the vehicle, either via an ISOFIX or a seatbelt. Your baby’s seat clicks on and off the base, and indicators let you know when it’s in the right place, lowering the possibility of a bad fit or overuse.

Conclusion

Removing your Graco car seat from its base takes a few simple measures and moments. You should consult your Graco owner’s handbook if you run into any difficulties while doing this.

Expert Opinion

Pressing down on the front of the seat and pulling it up and out of the base can quickly remove a Graco car seat from its base. Before entirely removing the seat, disengage any last straps or cables. You shouldn’t have too much issue removing your Graco car seat from its base with a little effort.

How to Keep Mice Out of Car Cabin Filter | 20 Tips No one Tell You

0

Although mice might annoy your automobile, they are not the only creatures who choose to sit in the back seat. Norway rats are common pests that enjoy residing in your car. If you want to feel safe while driving, it’s crucial to discover a strategy to keep rodents out of your home if you reside in a rodent-prone location. Let’s learn how to keep mice out of car cabin filter.

How to Keep Mice Out of Car Cabin Filter

Here are 20 pro tips to keep mice out of a car cabin filter:

  • Understand the Common Entry Points
  • Understand the symptoms of a mouse infestation in a car cabin filter
  • Understand why mice are attracted to car cabin filters
  • Seal off any potential entry points
  • Seal Off Gaps and Openings
  • Set up mouse traps around the car cabin filter
  • Consider Store-Bought Traps
  • Use mouse repellent to discourage mice from getting into the car cabin filter
  • Clean any areas around the car cabin filter regularly
  • Inspect the car cabin filter frequently
  • Clean the filter area with a vacuum and brush
  • Install a new filter cabin
  • Maintain the car cabin filter properly
  • Replace the car cabin filter if necessary
  • Keep Your Car Clean
  • Use Natural Repellents
  • Make Use of Essential Oils
  • Set Up Mesh Screens
  • Clean Out Debris and Stagnant Water
  • Call a professional exterminator if needed

Let’s break down the steps in detail;

Understand the common entry points

It’s crucial to first look into how mice initially end up in the carbine filter. When a car is left idle for an extended time, it might become a welcoming environment for mice and other pests to establish a home.

How to Keep Mice Out of Car Cabin Filter

For this reason, you should be prepared with tools and equipment to determine how mice get in. There are several ways a mouse might enter your automobile, even if the doors are locked, and the windows are down.

Understand the Symptoms of a mouse

Your automobile may suffer aesthetic and mechanical damage from mice, and because they are known disease carriers, rodents may also harm your health. They can spread illnesses, including leptospirosis, salmonella, Hantavirus, and more.

How to Keep Mice Out of Car Cabin Filter

One of their preferred nesting spots is the car’s air filter. If there are mice in this region, turning on the air conditioning will force all of their waste products and other unpleasant things into the cabin, triggering allergic reactions and perhaps even spreading illness.

Breaks might be slight or potentially fatal. Your radio ceased to function. Take your automobile to the closest garage since your engine can be flooded. You and every passenger are in urgent danger if the brakes or power steering malfunction.

Understand why mice are attracted to car cabin filters

Cabin filters are meant to remove excess dust and allergens from the air inside your car. However, these air filters can also collect enough dirt and grime to serve as a buffet for mice. The rodents are naturally drawn to the smell of oil, grease, and other engine fluids trapped in the filter.

How to Keep Mice Out of Car Cabin Filter

Once the mice have chewed through the filter, they can make their way into areas of the engine that you wouldn’t want them to get access to. The damage that mice can cause isn’t just limited to making your engine filthy.

They also leave droppings, fur, and other unsanitary materials behind as they chew their way through the filter. This can cause serious health hazards such as allergic reactions, breathing problems, and even sickness in people who come into contact with the contaminated air.

Clean the filter area with a vacuum and brush

The first thing you’ll want to do if you find evidence of mice in your car is to clean the filter area. Start by vacuuming up any debris that is covering the filter. If you notice chewed-up pieces of filter or signs that mice have been chewing through the cabin filter, a brush can help you remove them.

Clean the filter area with a vacuum and brush

However, you don’t want to use any old brush. Mice have sharp teeth, so you’ll want to use something meant to remove their teeth marks. Otherwise, you risk creating new scratches in the filter, worsening the issue.

Maintain the car cabin filter properly

One of the best ways to keep mice out of your car filter is to maintain it properly. First, you should check the filter every 15,000 miles or once every six months if you drive little. The filter is under your hood and covered by a large plastic grill. You’ll need a wrench or screwdriver to get this open.

Maintain the car cabin filter properly

If you find that the filter is clogged, clean it out with a vacuum. You may also want a soft brush to remove any caked-on dirt. If you don’t clean the filter every six months, it will become plugged with dirt and debris from the air in your car.

This will lead to the filter overloading with dirt and dust, making it more likely for mice to find a home in your car. If you need to replace your filter, purchase a cabin filter from a reliable brand. The cabin filter from a well-known company is likely to be of higher quality than a generic filter that costs significantly less.

Replace the car cabin filter if necessary

If the filter is so badly damaged that it can’t be cleaned and maintained, it’s time to replace it. However, it’s important to remember that mice won’t stop trying to enter your car when the filter is replaced. You must ensure that the new cabin filter is protected from mice.

Replace the car cabin filter if necessary

You can find replacement filters at most auto parts stores. Go to the automotive section of the store, and you’ll likely find shelves stocked full of different cabin filters. If you can, choose a filter from a well-known manufacturer.

These filters are of higher quality than generic ones, which means they’re less likely to tear or become damaged after a few cleanings. Before putting the new filter in, do the following:

  • Clean the filter area
  • Vacuum up any debris covering the filter.
  • Brush away anything that remains
  • Use a brush meant to remove mice’s teeth marks.
  • Use an oil-free cleanser 
  • You don’t want to leave behind any scent that mice like.
  • Put the new filter in 
  • Be sure to put it in correctly, so it doesn’t fall out. Secure the filter
  • You can use a strap to tie it down, so it doesn’t fall back out.

Set Up Mesh Screens

If you’re not ready to replace the cabin filter, you can create a barrier to prevent mice from getting inside your car. This extra layer of protection will make it harder for rodents to get to the filter, and it will also make it easier for you to check for chewed-up pieces of the filter. 

Set Up Mesh Screens

Materials Needed to Set Up a Mesh Screen 

  • A roll of mesh screen 
  • Power tools to cut the mesh Screen 
  • A stapler to secure the mesh 
  • A Phillips screwdriver to secure the screen to the filter 

You’ll want to place the screen over the filter before you put the filter back in place. This will make it harder for mice to chew through the filter. Make sure to secure the screen to the filter using the Phillips screwdriver so that it doesn’t fall off. Using a screen meant for this purpose will ensure that it doesn’t disintegrate and tear.

Infestation in a car cabin filter

Clean up the rubbish in your car, remove any dirt, and place traps for the furry intruders if you want to get mice out. You might also need to clean your car’s engine bay. Even though you often think little rodents are lovely, mice may ruin your automobile and cost you hundreds of dollars in repairs.

Infestation in a car cabin filter

Mice may chew through your seats, contaminate wiring, leave droppings, and create a bad stench throughout your car in only a few days. Additionally, mice can get infections that are dangerous to their health.

Seal off Gaps and Openings

Although it’s a terrific solution, there are other ways to prevent mice from getting into your car’s air filter. You may also apply this approach if you want to use something other than old socks (a good option if they are stinky and soiled).

Seal off Gaps and Openings

For most automobiles, it’s sufficient to just lay one or two pairs of clean, dry socks on top of your used ones in each seat. Before installing them, ensure all holes are covered with tape or something similar to prevent mice from getting stuck inside and dying while attempting to leave.

Seal off any potential entry points

Seal off Gaps and Openings

After a long day of driving, many of us have forgotten to shut a window. To keep mice from getting inside your automobile, though, this is crucial. A roaming mouse can be kept out by plastering prominent openings like windows and sunroofs.

Install a new filter cabin

Install a new filter cabin

It’s time to install a new cabin filter back in the automobile after cleaning it. Be careful when you fix it with Velcro or other means in your vehicle’s appropriate area. At this stage, you should also check for leaks since, if there are any, mice might enter your automobile through those openings and cause havoc there.

Inspect the car cabin filter frequently

Inspect the car cabin filter frequently

To remove the filter, use a screwdriver, taking caution not to damage it. If you wish to clean your new cabin filter carefully, you may use a vacuum (or a moist cloth).

Set up a mouse trap around the car cabin filter

The easiest technique to get rid of mice in automobiles that already have mice is to set traps. There are several traps, including sticky boards, live traps, and snap traps.

Set up a mouse trap around the car cabin filter

Use a trap that is easy to inspect often and dispose of mice appropriately. These recommendations will help you keep mice out of your car’s cabin air filter and minimize any harm they may do. To get assistance with your mouse problem, contact a qualified exterminator.

Consider store-bought traps

Consider store-bought traps

Mouse traps are available at many places, or you may get them online if you’d like. Use them as instructed and put them in the cabin. You can buy humane traps if you don’t want to kill invasive pests. Make sure you release the pets far from where you park your automobile.

Use Mouse Repellent Products

Use Mouse Repellent Products

When it comes to pests, prevention is preferable to treatment. Use repellents for rodents to prevent mice from accessing your automobile as a makeshift home. Peppermint oil spray is a fantastic place to start if you’re searching for anything that can efficiently ward off mice. Mothballs are another excellent choice.

Keep your car clean

Keep your car clean

Avoid allowing your automobile to become a home for these pests. Start by properly disposing of your garbage rather than letting it build up. Use caution if you or your relatives like to munch on the move. Avoid bringing food that will leave crumbs or other messes, and throw away any packaging as soon as you are done eating.

Clean any area around the car cabin filter regularly.

Clean any area around the car cabin filter regularly.

If you plan to park your automobile for an extended time, be cautious until you return. Place baits and insect repellents around the car and check that there is no food or organic waste within the cabin.

Use natural repellents

Use natural repellents

You may buy many kinds of insect repellant at your neighborhood hardware or home improvement store to use inside and outside your automobile. Whether you have a mouse problem, doing this is a good idea if your automobile has been sitting still for a while.

For a more natural option, you may also scatter cayenne pepper, cotton balls soaked in peppermint oil, or cedar shavings around the car.

Clean out debris and stagnant water

Clean out debris and stagnant water

The possibility that roving rats may use the garbage to scale your car is often mentioned. Make an effort to keep the space surrounding your parked automobile as tidy and clean as possible. Mice don’t feel safe. Thus, they are less inclined to run outside.

Make Use of essential oils.

Potent-smelling essential oils like peppermint and clove oil can repel mice. If you want the greatest effects, soak cotton balls in your preferred essential oil and place them where you’ve seen mouse activity, such as cabinets, closets, and beneath sinks.

Make Use of essential oils.

The aroma won’t kill mice, but when combined with other techniques, it may be a powerful deterrent.

Call a professional exterminator if needed.

Call a professional exterminator if needed.

You may always contact a pest control specialist. In this situation, you should seek out someone who specializes in rodent control or has extensive knowledge in this field. If your infestation is serious, this could be your best option. If you are hesitant to solve the issue independently, getting expert assistance is the best course of action.

Frequently Asked Questions

Can A Mouse Get into The Cabin Air Filter?

Mice can indeed enter the cabin air filter. However, you may prevent this by ensuring that your car’s cabin is completely sealed off and devoid of any gaps or crevices that a mouse could squeeze through.

Contact a car maintenance specialist for assistance in maintaining your vehicle’s interior if you need help with how to do it.

Mice are tiny animals with powerful teeth and claws that they use to pursue prey like birds or other rodents. If they escape from their cages, they might be rather deadly.

How can I Keep Mice out of my Car?

You can prevent mice from entering your car in some ways.

  • Mouse repellents can be bought at a hardware shop or produced at home using cinnamon and peppermint oils. You may also construct your homemade mouse repellent by combining equal portions of each ingredient with a few drops of dish soap. This will effectively prevent mice from getting inside your car.
  • You may purchase mousetraps online, at some hardware stores, and in neighborhood pet shops. They are simple to put up and have labels advising how long they will last (usually 2-3 days).
  • Suppose you’re concerned about what can occur if someone starts one while in their car, which might be a mess. The best place for them is behind chairs where fewer people are seated at once, not near potential food or water supplies (i.e., no children). 

How can mice in your car’s air vents be avoided?

Making sure mice can’t enter vents or other holes is one of the greatest ways to keep them out of your car.

It’s time to take action if you find a place where mice have gotten inside your car.

It would help if you cleared the car’s interior of all food, including wrappers from fast food restaurants and waste bags. They can’t be drawn to anything else because of this.

Additionally, ensure that all electrical equipment is covered with plastic wrap or tape so that no wires are exposed; Cleaning up any food crumbs or other trash in the car is still another option.

This will assist in getting rid of smells like spilled drinks or used fast food containers that can attract mice. You should set up a trap or use a repellent if that doesn’t work.

How can mice get into the air filters in vehicles?

Mice are mainly brought indoors by your HVAC (heating, ventilation, and air conditioning). To get to the vents, they can squeak through the material of your cabin air filter.

How are mice removed from the cabin?

Mouse traps are available at many stores, or if you’d prefer, you may get them online. Use them as instructed and put them in the cabin. You can buy compassionate traps instead of killing invasive pests.

What occurs if mice enter your car?

Additionally, they urinate and defecate everywhere they go, which can contaminate the car’s air intake and cause breathing difficulties. Additionally, mice can spread illnesses like salmonella and Hantavirus that are human-transmissible.

How may rodents be kept out of your car?

If you mostly wash carpets and transport them in your car damp, dry them first. Keep in mind that a little moisture might be an oasis for thirsty rodents. Roaming rats can use debris to scale your vehicle. As a result, ensure the space around your parked automobile is as tidy and well-lit as possible.

Conclusion

When there are gaps or cracks in the windshield, mice sometimes enter cars through the air vents. It can be complicated to figure out where they’ve been and how they got there. The point listed above is a few things you can do to keep them out.

Expert Opinion

It will be simpler to prevent mice from entering the cabin if you can store your car in a garage. Try covering the air intake with a hardware cloth or another firm material to keep mice out if you have no other options for parking your car and want to prevent them from getting inside. Covering your car’s air intake may be an efficient technique to keep them out if you park outside without any protection (as many people do). 

Resources:

How to Fix No Compression in One Cylinder | 14 Steps DIY Guide

0

You might need to become more familiar with in-cylinder issues, but it pays to be prepared if your engine ultimately develops issues with low compression in a cylinder. The information you need to fix low cylinder compression on your own will be briefly covered in this article.

How to Fix No Compression in One Cylinder

Here are the steps to fix no compression in one cylinder:

  • Identifying the Cause of No Compression 
  • Troubleshooting Steps to Fix No Compression 
  • Check Cylinder Compression 
  • Replacing or Repairing the Cylinder 
  • Inspect the Valves 
  • Inspect the Piston Rings 
  • Check the Piston 
  • Replace the Piston Rings 
  • Clean the Cylinder Head 
  • Replace the Gaskets 
  • Reassemble the Cylinder 
  • Replacing Bad Components 
  • Test for Compression 
  • Troubleshoot Common Issues

Read More: Most Common Car Problems on Road Trips

Identifying the cause of No Compression

After checking the compression in your engine and discovering low compression, you must determine what is causing the low compression. Unfortunately, the only effective option to stop low compression is to replace the defective part or parts, making a solution to this issue costly. Working carefully with possible problematic components is important since several components might cause compression issues.

How to Fix No Compression in One Cylinder

When you locate a problematic component, replace it and do another compression test to see whether the issue was fixed. If not, keep searching for broken components to replace until the compression test is completed. A compression repair product could be able to fix a broken part. To save money, this approach should not be utilized in place of replacing a damaged component. It won’t take forever to repair, and replacing the item right away will be simpler and take less time.                    

Troubleshooting steps to fix no compression

Some techniques you may employ to identify the source of low compression. You require a compression tester, ideally a leak tester, to identify low compression issues.

Inspect the timing belt or chain and camshaft timing if you have poor compression in any or all cylinders.

How to Fix No Compression in One Cylinder

Check if the compression test results improve if one of your engine’s cylinders has poor compression by adding oil. There are two reasons why you can experience increased pressure after adding the oil. First, if your automobile continuously misfires, petrol may wipe off the cylinder walls and reduce compression. The piston rings’ inability or obstruction is the second factor. This may resolve the issue in certain circumstances, but you often need to replace the piston rings.

How to Fix No Compression in One Cylinder

Get rid of the oil cap. While the engine is running, remove the oil cover. You may need to replace the piston or piston rings, fix a crack, or replace the piston if you have severe overpressure and smoke from the pistons leaking into the crankcase. There should be a tiny vacuum in the crankcase at idling if everything operates as it should.

Troubleshooting steps to fix no compression

To find the leaky compression, use a leak tester. Check the timing of the camshaft while both valves are closed, pressurize the cylinder, and listen for compression leaks from the intake, exhaust, or crankcase breather.

Troubleshooting steps to fix no compression

Change piston rings

Rusted or broken piston rings are another typical reason for poor compression. Your automobile engine has 2 to 4 piston rings surrounding each piston. These rings guarantee hardly any compression leaks in the crankcase and stop oil from getting into the combustion chamber.

Change piston rings

Age-related wear and tear on the piston rings do occur. Luckily, new automobile engines are rarely harmed or worn out. Since you must remove the complete engine, which is costly, replacing the piston rings requires luck.

When the engine is old, the piston rings might get clogged with engine muck, preventing them from correctly expanding and sealing against the cylinder walls.

If this is the problem, you can correct it by taking out the spark plugs, adding additional diesel fuel to the cylinders, letting them sit for a while, and then doing another compression test. Sadly, you’ll have to buy new ones if they’re broken or too worn.

Check cylinder compression

Check cylinder compression

If your car has been sluggish or lost power, there could not be enough pressure in one or more cylinders. The piston applies to the air-fuel combination by measuring the pressure before the spark plug ignites the mixture. A pressure gauge may monitor the cylinder’s compression and detect if pressure is leaking from the engine. These meters are cheap and simple to use. While others must be left in, some indicators screw into the spark plug hole.

Replacing or repairing the cylinder

Replacing or repairing the cylinder

If your car has been sluggish or lost power, there could not be enough pressure in one or more cylinders. By measuring the pressure, the piston applies to the air-fuel combination before the spark plug ignites the mixture; a pressure gauge may be used to monitor the cylinder’s compression and detect if pressure is leaking from the engine. These meters are cheap and simple to use. While others must be left in, some indicators screw into the spark plug hole. 

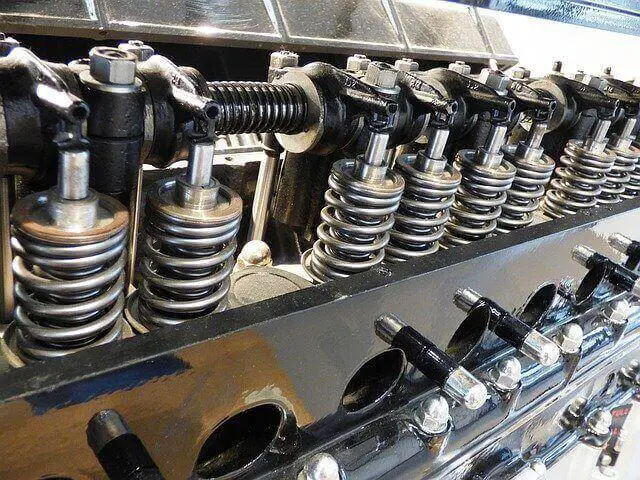
Inspect the valves

Exhaust and intake valves are located at the top of each cylinder. The valve seats, connected to the cylinder heads, hold the valves. A metal that has been finely ground creates a seal in both portions. Air and fuel are introduced through the intake valve to power the combustion process. Gases that come from this leave the exhaust valve.

Inspect the valves

The valve seal may deteriorate if the valves overheat. This permits gas to pass through and prevents cylinder compression.

Use a compression tester rather than a spark plug to check for leaking valves while the engine is running. Watch for gas leaks in the intake manifold or exhaust pipe. You can identify damaged valves by listening for any leak-related sounds. You will need to remove the cylinder head and get some valve repair done if it turns out that your valves are damaged.

Inspect the piston rings

Your piston rings can overheat and crack. Carbon gases are not contained in the cylinder. Thus, they will escape via the rings. It’s possible to harm the pistons themselves. Typically, pistons are built of an aluminum alloy resistant to combustion-related damage.

Inspect the piston rings

However, the pistons may develop holes if the engine is overheated. As a result, the compression will be reduced, and gas will escape from the perforations. You may insert oil into the spark plug hole to check the condition of your pistons. Test the compression after that. The piston or piston rings cause the compression issue if it is higher.

Replace the Gasket

A sizable gasket is positioned between the engine block and cylinder head to separate the oil, coolant, and compression. Numerous symptoms, such as oil in the coolant or compression in the coolant, might occur if this gasket fails. An undesirable metal head gasket ring that surrounds each cylinder might crack.

Replace the Gasket

Compression will flow between the two cylinders if this ring breaks. Along with other symptoms, this may result in low compression. If pressure leaks from one cylinder to the other, it is simple to measure this with a leak tester. Repairing a cylinder is often less expensive and simpler than replacing it. However, replacement may be an option if the repair cost is too high or the issue cannot be fixed. Ask your engineer.

Troubleshoot common issues 

Your cylinders have low pressure throughout, no compression in any of them, or none. Low compression in a cylinder is one of these issues’ contributing factors. A broken timing belt or camshaft can also result in low compression in all cylinders; however, damaged piston rings are the main cause of this condition.

Troubleshoot common issues

There are various more reasons why there could be no compression at all in a cylinder. There may be no compression in a cylinder due to a dropped valve seat, damaged valve, broken valve spring, or dropped valve.

What Stops one Cylinder from Compressing?

Here are a few reasons a cylinder in your engine cannot be compressed.

Defective valve

Defective valve

Each of the two metal half-moon-shaped valve retainers is in charge of retaining the valve in place by locking it into the retainer. These valve retainers may malfunction, causing the retainer to dislodge and the valve to descend into the barrel and engage with the engine.

Defective piston 

Defective piston 

Another reason your engine could not feel compression in a cylinder is damaged or defective piston rings. If the combustion chamber of a vehicle produces too much heat, the engine might be harmed. Once the piston has been scorched, it will appear to have melted or a charred hole in the top. Implosion is typically to blame for this problem.

Malfunctioning valve

Malfunctioning valve

It is necessary to seal the valve head and bottom together. If the valve is damaged, it may no longer align with the base, allowing it to fall into the barrel. As the valve head reaches the cylinder, compression will undoubtedly leak out, severely damaging the exhaust system and piston.  

Weak valve spring

Weak valve spring

The valve spring is meant to seal the outflow and input valves as soon as the engine opens them. Over time, the valve spring may break, which will certainly cause the valve to stick open and lead to compressive leakage.

What occurs if a Cylinder Breaks Down?

You’ll be able to tell whether one of your car’s engine cylinders is damaged by the experiences listed below.

Power outage

Power outage

When a cylinder in your car’s engine fails, you’ll often hear banging and misfiring from the engine. Engine power may be proportionately reduced as a result. You might lose up to 25% of the vehicle’s power if one of your car’s four cylinders isn’t operating properly.

Improper fuel usage

Improper fuel usage

You may also have low fuel efficiency in one of your car’s tanks, a common occurrence because each cylinder supplies the engine’s power. When one malfunctions, the load on the other cylinders must rise to make up for the reduction of energy in the turbocharger. Because more gasoline is needed to power the engine due to the additional cylinders being under higher stress, fuel efficiency suffers.

Engine turbulence

When your vehicle rattles or swings when idling, one of the pistons is broken. Due to a cylinder misfire, your car may idle slowly and vibrate loudly when the engine is running.

Engine turbulence

Get your car checked to discover if you have a cylinder failure, regardless of whether you experience any situations. So then, you can seek fast assistance from a reputable auto repair shop to fix the problem before it gets severe.

Frequently Asked Questions

What stops one cylinder from compressing?

The reason for loss of compression is a leak in one or several of the cylinders brought on by typical engine wear. Loss of compression in a cylinder can result in sputtering and poor driving performance. Power output loss is an indication of worn internal components.

Can one piston operate without compression?

Yes, you can still drive with only one cylinder compressed, but your car’s engine may have problems, such as stalling. Even if you can start and drive your car with no compression in one cylinder, your automobile’s engine won’t function properly.

Can a car be operated with only one pressurized cylinder?

Yes, you can still drive with only one cylinder compressed, but your car’s engine may have problems, such as stalling. Even if you can start and drive your car with no compression in one cylinder, your automobile’s engine won’t function properly.

If a cylinder has no compression, what should you do?

Low pressure in two adjacent cylinders is often the result of a burst head gasket. The only way to fix low compression is to replace the leaky component, whether the valve, cylinder ring, sprocket, head sealant, or valves.

Conclusion

At this point, it has been proven that even while you might be able to drive your car with one cylinder not compressed, you shouldn’t since it will likely cause an engine misfire. This might seriously harm your automobile’s engine if not fixed right once.

Expert Opinion

Low compression issues in the cylinder might significantly impact your car’s performance. It would be highly beneficial to have regular engine inspections to keep even the smallest component in good condition and functioning properly.