Are you looking for a fun and creative activity with your kids? Why not make a box car?
It is an excellent way to spend quality time together and allows your child to use their imagination and creativity to build something from scratch.
After going through this blog post, you will be acknowledged enough for making a box car for kids.
These are the steps that we are going to follow:
- Gather the materials – cardboard box, rubber bands, paper clips, pencils, scissors, markers, and tape
- Measure and cut the cardboard box
- Attach wheels to the cardboard box
- Attach handles to the cardboard box
- Add the rubber bands, paper clips, and pencils to the cardboard box
- Color your car
- Create a steering wheel with a paper clip and a pencil
- Test the car to make sure everything works properly
- Test the car to make sure everything works properly
How to Make a Box Car
Step 1: Gather the materials
Before you begin, make sure you have all the necessary materials within reach. This will save you time and make the process smoother.

To make a box car, you’ll need a few materials, such as:
- A cardboard box.
- Rubber bands.
- Paper clips.
- Pencils.
- Scissors.
- Markers.
- Tape.
Once you have everything you need, follow these simple steps:
Step 2: Measure and cut the cardboard box
Using a ruler and scissors, measure and cut the cardboard box into a car shape. Depending on the box size, you can make it as big or small as you want.


All you have to do is have a deep look at the one-by-one below picture and go ahead according to it.
Step 3: Attach wheels to the cardboard box
Attach wheels to the bottom of the cardboard box using tape or glue. You can use any circular object as wheels, such as plastic lids, bottle caps, or cardboard circles.
I am using disposable plates. Firstly, pour glue in its corners, then paste it on cardboard, as shown in the pictures.


Step 4: Attach handles to the cardboard box
Attach handles to the sides of the cardboard box using tape or glue. You can use paper cups, toilet paper rolls, or anything else that can serve as handles.
Step 5: Add the rubber bands, paper clips, and pencils to the cardboard box
Attach rubber bands to the front wheels using paper clips to make the car go. Then, attach pencils to the back wheels using paper clips. When you wind up the rubber bands, the car will move forward.
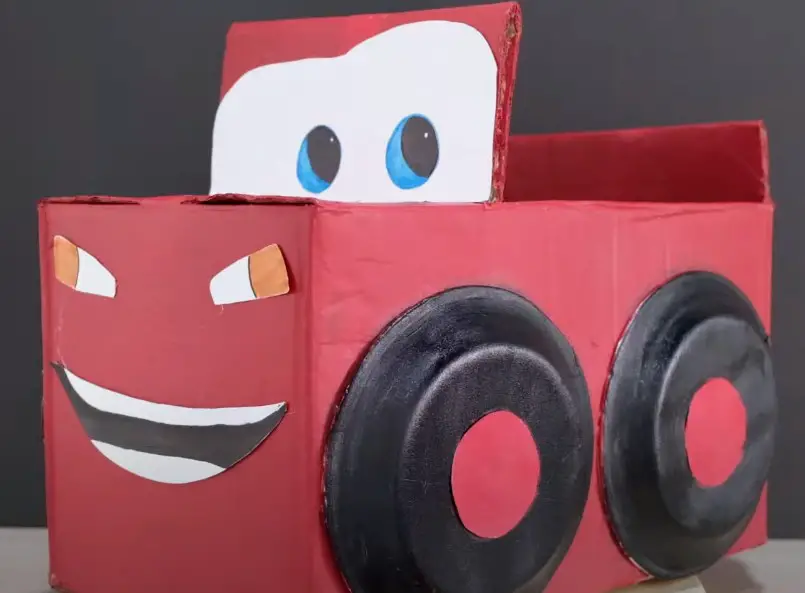
Step 6: color your car
Let your child’s imagination run wild as they decorate the car with paint.
You can paint it any color, but I will go with red. You have to paint it carefully and with full concentration.


Step 7: Create a steering wheel with a paper clip and a pencil
To give the car a steering wheel, bend a paper clip into a circular shape and attach it to the front of the car.
Then, insert a pencil through the paper clip to serve as the steering column.
Step 8: Add details and give it a realistic look.
Using a paper clip and a marker, create a flag and attach it to the back of the car. This will make the car look even more exciting.


Step 9: Create a steering wheel with a paper clip and a pencil
To give the car a steering wheel, bend a paper clip into a circular shape and attach it to the front of the car. Then, insert a cutter and cut it from the inside.

Step 10: Test the car to make sure everything works properly

Once your child has completed the box car, test it to ensure everything works correctly.
If you notice misalignments correct them or fix them as soon as possible.
Instead, please pay attention to stuck parts and examine whether they are attached properly. If they aren’t, then pour more glue and make it rigid.
My Opinion
Building a box car is fun and engaging to help children develop their creativity and problem-solving skills.
The process involves gathering materials such as cardboard boxes, rubber bands, paper clips, pencils, scissors, markers, and tape.
The first step is to measure and cut the cardboard box to the desired size. Next, wheels and axles should be attached to the car. Handles can also be added for steering and control.
Additional features such as windows, doors, and decorative details can be cut out and added using markers or colored paper. A steering wheel can be created using a paper clip and pencil, and a flag can be attached using a marker and paper clip.
It is important to supervise children closely during construction and ensure they use appropriate tools and materials for their age and skill level.
Safety is also a key consideration and protective padding or cushioning can be added to the car’s interior to prevent injury in case of a crash.
Once the car is complete, it can be tested on different surfaces and inclines to see how it handles different terrain.
Building a box car can be a great way to promote creativity, problem-solving, and hands-on learning for kids of all ages.

James Carter is an automotive blogger, reviewer, and technology enthusiast based in the USA. With a deep passion for cars and years of experience following the automotive industry, James focuses on delivering honest, well-researched content that helps readers make smarter decisions.