Paint protection film is a great way to protect your car’s paint job, but how do you remove it once the warranty has expired? Removing paint protection film can damage paint and body panels if you’re not careful. Luckily, there are ways to remove your vehicle’s clear bra or other protective film without damaging the paint. Here’s what you need to know:
How to Remove Paint Protection film without Damaging your Car’s Paint

Wait to remove the film after application.
Paint protection films need to be allowed to cure for at least 24 hours before removal. How do you know if it’s cured? You can tell by looking at your paint and feeling its surface with your hand; if there is any obvious residue (for example, dust or dirt sticking), then the film isn’t fully cured yet and should be left alone until it has had time to form a bond with your car’s paintwork fully. If this happens, don’t panic! Just give it another day or two before trying again.
You can also tell if the paint protection film is cured by looking at it under a microscope. If there are any gaps in the film, these will be visible; however, if there are no gaps or holes in the coating, it should be fine to remove.
Use a heat gun to loosen the film.
The heat gun is the most effective tool for removing paint protection film. However, it would help if you were careful not to damage your car’s paint or the film itself.
- Do not use a hair dryer. Hair dryers are made to heat air, which can damage both the paint and the film if used incorrectly.
- Please do not use a torch (flame) or other open flame method for heating your car’s surface; this will immediately burn through both layers of protection and leave permanent discoloration on both surfaces in its wake!
- While it may seem counterintuitive, using a heat gun directly on either layer could also ruin them by melting them into an unidentifiable goo blob.
Remove the film in small pieces.
Removing paint protection film is a delicate process that requires patience and care. The last thing you want to do is rush through it, which could damage your car’s paint. Start by removing the corner of the film with your fingers or a razor blade. If this doesn’t work, use a heat gun to loosen up the glue underneath so you can easily pull off each piece individually without leaving any residue behind.
Avoid using sharp tools when removing paint protection film; you’ll only end up scratching or cutting into your vehicle’s clear coat!
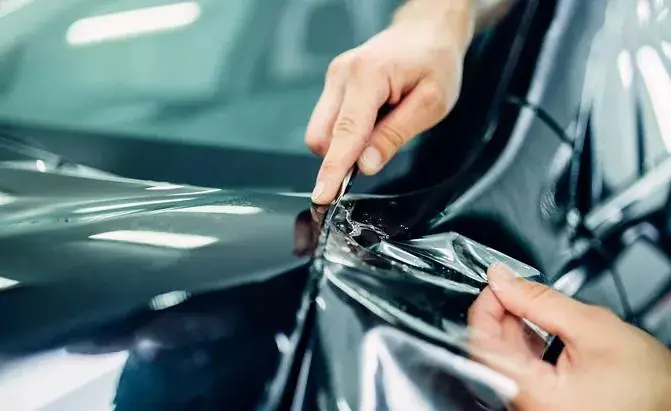
Start by peeling it off at one edge with your fingers or a small piece of durable plastic wrap.
Start by peeling it off at one edge with your fingers or a small piece of durable plastic wrap. Pull the film back upward once the first corner is lifted, ensuring you’re not damaging any part of your vehicle’s paint job.
If any stubborn adhesive is left behind on your car after peeling off the film, use a heat gun to soften up the adhesive so it can be easily scraped away with a plastic scraper or razor blade (be careful not to scratch any paint).
Carefully pull the sheeting away from your car and let it hang while you’re working on another section of film.
Pulling the sheeting away from your car is a very important step. If you pull too hard and do not protect the paint, there is a chance that you could damage your car’s finish. The best way to do this is with a plastic wrap or cloth; just be careful not to pull too hard!
If you are having trouble removing all the film, there are some options for loosening it up without damaging your paint job:
- Heat gun (high heat) – this will loosen up any adhesive that has been left behind by removing all the adhesive residue from under each piece of film; however, if used improperly, it can also cause damage like melting parts of trim pieces, which would require repainting them or replacing them altogether.
- Sandpaper blocks – these are effective but only work when working on small areas at once and should always be done by hand rather than power tools because they can easily scratch off clear coatings if applied incorrectly
- Chemical solvents such as lacquer thinner/acetone – are effective and safe for all types of paint but can be time-consuming if used improperly.
- Using a scraper tool or razor blade on the edges of each piece of film to loosen it up – this is recommended if you want to avoid any damage to your paint job by using a heat gun or sandpaper blocks.
- Using dish soap and water on the edges of each piece of film – is also a good option for removing any adhesive residue and should be done with a toothbrush or cotton swab to get into all the small crevices.
- Using rubbing alcohol on the edges of each piece of film – will help loosen up any adhesive that has been left behind by removing all the adhesive residue from under each piece of film.
Use a shop cloth or paper towel to wipe down the area with PPF.
Once you’ve removed all the sheeting, use a shop cloth or paper towel to wipe down the area where it was before you start cleaning. This will prevent any loose pieces of film from being trapped in your wash mitt.
- Do not use a brush! Brushes can damage your paint and leave swirl marks that are difficult to remove.
- Do not use sponges! Sponges also tend to leave scratches in your paint job.
- Don’t use rags; they absorb too much water and cause scratches on sensitive surfaces like glass windows or plastic bumpers.
Better hire a professional to remove and install paint protection film
If you have decided to remove the paint protection film yourself, then there are a few things that you need to know before proceeding. You must follow your manufacturer’s directions and use the correct tools for removing your product. Failure to do so could result in damage or even failure of your paint protection film!
If you want to have PPF installed on your Tesla professionally, you need an experienced Tesla paint protection film installer! They will have experience with this process and know how to do it without damaging your car’s finish or scuffing its surface while removing/installing their product.
Paint protection film must be removed to not damage your vehicle’s paint job.
If you’ve decided to remove your paint protection film, there are a few things to keep in mind. First, make sure that the film is still installed correctly. If it is, you must get it off before proceeding with this guide.
Next, try to remove only some of the film at a time; it could damage your car’s finish if done properly or hastily. Instead, start peeling away pieces of protection one at a time until only bare metal remains.
Finally, be patient! You may have gotten impatient waiting for this moment, and now that it’s here, you want everything done right away, but rushing through something like this can lead to mistakes that take more effort than they should’ve taken originally.
My Opinion
As you can see, there are quite a few things to consider when removing your paint protection film. If you want to do it yourself and save money on professional services, then make sure that you follow these tips and tricks carefully before starting the process. The most important thing is patience: if something goes wrong with one piece of sheeting, don’t panic! Just take a deep breath and start over again from the beginning until everything looks right again – after all, this process will take some time, but in the end, it will be worth every second spent working hard on cleaning up afterward.

James Carter is an automotive blogger, reviewer, and technology enthusiast based in the USA. With a deep passion for cars and years of experience following the automotive industry, James focuses on delivering honest, well-researched content that helps readers make smarter decisions.