If you need your tank ready to breathe, you must equip it with a vent. It can release the vacuum and also pressure at the same time. As the temperature rises, gasoline expands in volume, while the volume decreases as the temperature falls. Remember that if your car is off, the fuel level in your tank can fluctuate throughout the day. This will vary depending on the manufacturer. Let’s learn how to vent a gas tank on a car.
The filter returns the fumes to the engine, where they are thoroughly burned before being released into the atmosphere through a vacuum hose. It is possible to ensure that a gas tank is properly vented by maintaining a charcoal canister regularly.
You will not be able to put fuel into your tank until you have removed all of the air from the tank. As a result, unless you allow air into the tank, you will be unable to remove fuel from your tank.
This was made by puncturing a regular gas cap with a needle. In the unfortunate event that the vehicle accelerates or turns a corner while this hole is present, gasoline will spill onto the roadway.
The installation of vent lines must always be done so that the line is installed higher than the highest point on the tank, which includes the fuel filler cap when the tank is filled with fuel. It should also be noted that the vent line should not be allowed to dip into it because this could allow fuel or condensation to become trapped in the line.
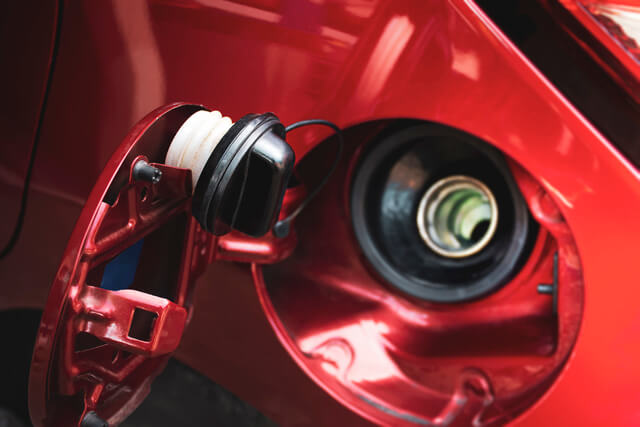
How to Vent a Gas Tank on a Car

Step 1
Raise the rear of the vehicle with the help of a jack and a jack stand to a safe working height. The charcoal (canister) is on the vehicle’s driver’s side. It is close to the fuel tank. You can access it easily from inside the vehicle. Before using the canister, make sure it is free of cracks, leaks, and strong fume odors.
Step 2
Use the hand vacuum gauge to check the canister’s seal. The idea is to ensure that it is still tightly sealed. Moreover, if the canister appears in good condition, determine if the air filter needs replacement. You will need to replace the charcoal canister in case of damages during the inspection process.
Step 3
Disconnect the plastic electrical and vacuum lines connected to the canister with a flathead screwdriver, and avoid damaging them. Check the lines to ensure they are in good condition and not need to be replaced.
Step 4
To get rid of the old canister, you must first lift it out underneath the vehicle. To properly install the new canister, make certain that it is properly positioned and securely bolted down.
Remember to reconnect the electric and vacuum lines. Also, the charcoal canister, once more, to ensure that the new canister functions properly and is securely fastened in its position, should be tested before use. To lower the vehicle, carefully remove the jack stands and lower the vehicle using the vehicle jack to its lowest point.
An important point to consider
If you have questions and are working on a new fuel system, a new hot rod, or an aftermarket fuel setup, there’s almost certainly something you can do to resolve them. During this session, we’ll talk about a rarely discussed topic: one of the most important components in a functional and well-designed fuel system is the fuel filter.
For the fuel tank, this is the vent size that will be used for it. The size of the fuel pump inlet, feed line, return line, and all that other nonsense is always a topic of discussion in the industry. The size of the fuel vent, on the other hand, is something that a lot of people overlook and completely forget about.
This is important for your car’s health.
This causes many fuel pump failures, and the most important thing to remember is that just like a PCV system can catch fire in an engine, you can never vent a fuel system in your vehicle, which is where most people get into trouble with their vehicles.
The return line and vent line sizes should not be ignored, as doing so will result in significant disaster on your hands. When we build a fuel cell, we have to start from the ground up.
As the pressure increases in a radiator, the temperature rises, so if you have a vent line that is too small, such as the one on a factory tank, you can use a smaller vent nozzle ranging from 5 to 16 inches in diameter.
There, you’re moving a lot of fuel, which creates pressure in the same way that your engine does and in the same way that a radiator does, and that pressure will eventually start to build up. At that point, it begins to work against the other components of the system’s overall strength. Additionally, it will work against the return line, preventing the fuel from being pumped out, and it will heat the fuel, which will result in problems with the way the car runs as a result.
That is, it’s going to boil the fuel, which can ruin the pumps and cause the fuel to boil, which will cause the pumps to fail.
Making the car run poorly is a problem that can be resolved fairly easily by simply installing a bulkhead fitting in the appropriate location. You will need to weld on steel tanks.
Especially if they’re old and crusty, as is the case, as a result, you’ll be using fuel cells that come with check balls that are as inexpensive as a two-dollar check valve.
Essentially, it’s a tip-over valve, which means that it has the potential to become clogged or gummed up over time. It doesn’t function properly in that location. As a result, it is sometimes preferable to consult with experts in the field.
Bottom line
Maybe you can find some oil in a line. So, your tank will build pressure or vacuum until it finds enough pressure to purge the vent results in the release of gas or odor from the vent line. If you can create enough pressure in your tank, it may cause damage.
Remember this: It is possible that the vent will not function properly due to the installation angle.
Before installing the vent, make sure that it is mounted vertically and that the check ball is in the bottom fitting of the vent. The vent will not function properly as a result of the installation angle.

James Carter is an automotive blogger, reviewer, and technology enthusiast based in the USA. With a deep passion for cars and years of experience following the automotive industry, James focuses on delivering honest, well-researched content that helps readers make smarter decisions.