
Creative artists will think of drawing a car from the back. But often, they need pointers and directions to get the expected result. For all that no need to worry more. Today, after going through this blog post, you will always succeed as an artist and can draw a car from the back. Now, I will give you some tips and strategies on how to draw a car from the back. For drawing a car from the back, all you have to do is get followed by following steps:
How to Draw a Car from the Back
STEP 1: Collect materials and tools
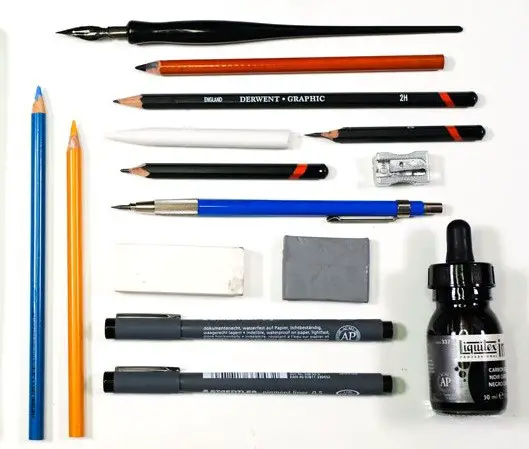
If you are thinking of drawing something, the first important step is to grab all your sketch material and tools.
Here I am giving you the list that should be in your sketch material:
- Good quality pencil.
- Pencil sharpener.
- Sketchbook.
- Variety of erasers.
- Color pencils.
- Paints.
- Artwork storage.
STEP 2: Choose the right color for your car
If you give color to your sketch, pick the right color.
Color of the sketch matter a lot. Because of color structures, the sketch gives light, tells the artist’s mood, takes art in depth, and describes the artist’s point of view. That’s why it is important to choose the right color.
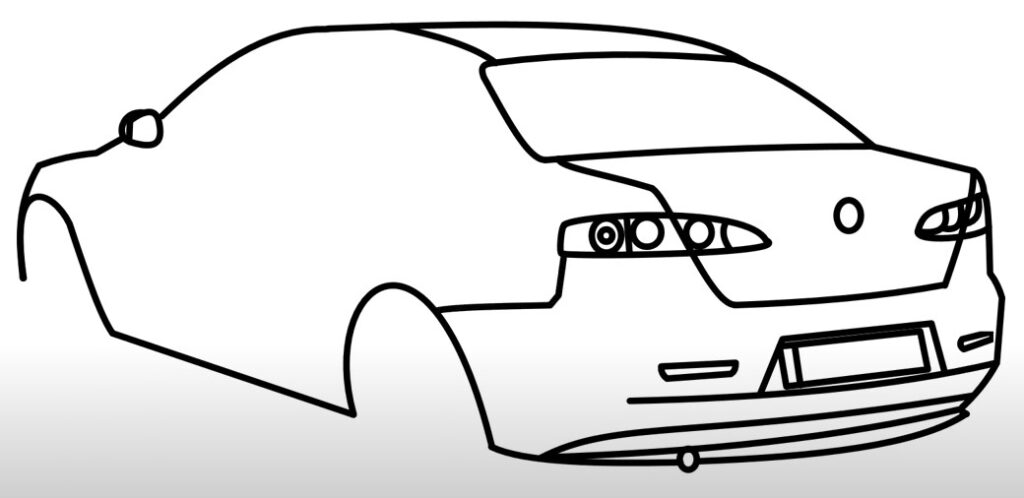
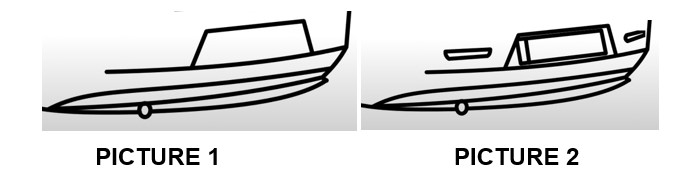
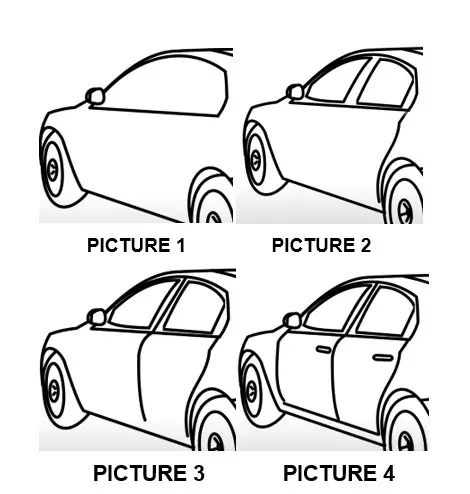
STEP 3: Sketch the Outline of the Car

After grabbing your sketchbook/material and choosing a color for your sketch car, the next step you have to move on is an outline.
You have to sharpen your pencil and start outlining your car. Outlining will give your car an overall shape and proportions. Especially if you are a beginner outline will help you.
Draw your car the same as in the above-shown picture.
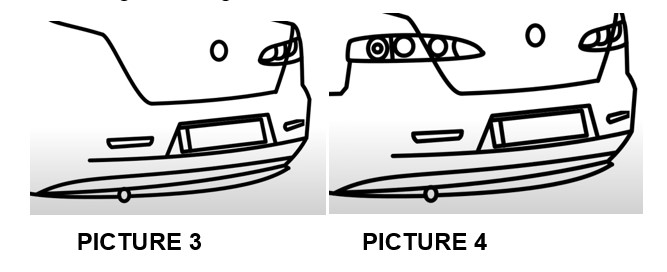
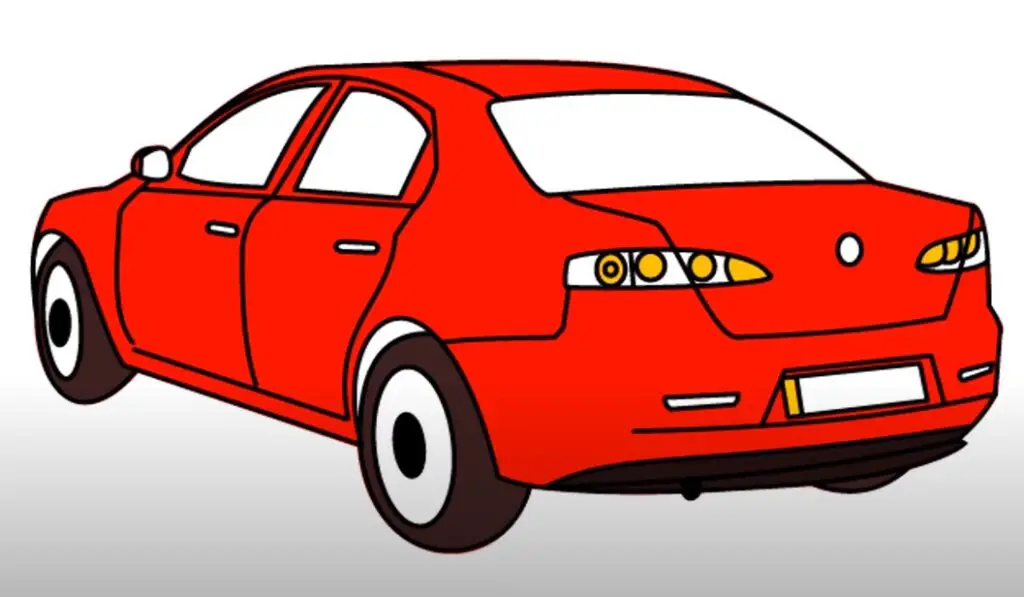
Step 4: Draw the Backside, Bumper, and light of the car
After giving an outline, you have to sketch its back bumper:
First, draw three horizontal lines, 2 lines should curve at the ending point as shown in the picture, but the upper third line should be horizontal and didn’t curve.
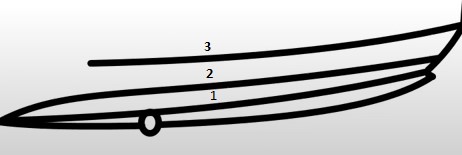
We can recognize number plates. Next, we will draw a number plate on the third horizontal line;
1.Draw half a hexagon on the third line, as shown in picture
2.Draw one rectangle into a half hexagon and a left vertical line inside it as a picture
3.Draw two rectangles on both left/right sides as a red light.
1.Draw a small circle in the center, as shown in picture
2.Now take your pencil to the left side of the car and start drawing a semi-oval shape circle as shown in the picture sketch.
3.Draw three semi-circles inside of the semi-oval so that it will look backlight.
4.Please do the same on the right side and give it also a look of right backlights.
STEP 5: Draw the Back Wheels of the Car
Now, for drawing wheels, you have to draw 4 circles inside of each other:
- Draw a curved circle that gives the wheel look, as shown in picture 1.
- Draw a complete circle inside the first circle as shown in 2 pictures.
- Draw a third small circle inside the second circle, as shown in picture 3.
- Draw a fourth circle inside the third circle giving a complete look at the wheel.
- Make some horizontal lines from the fourth circle for a final touch, as shown in the three pictures.
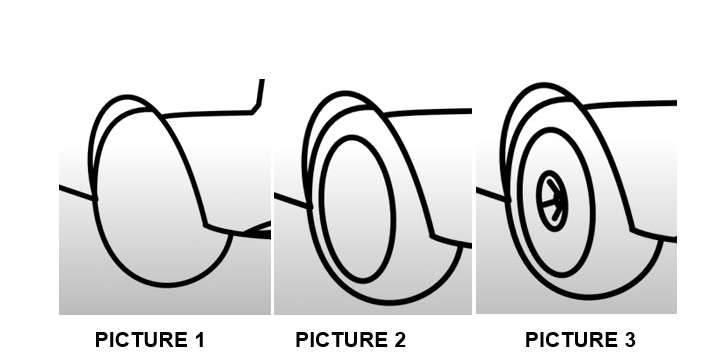
it was all about one wheel for the next wheel to follow these steps again.
After drawing both wheels, it should look like the above sketch picture.
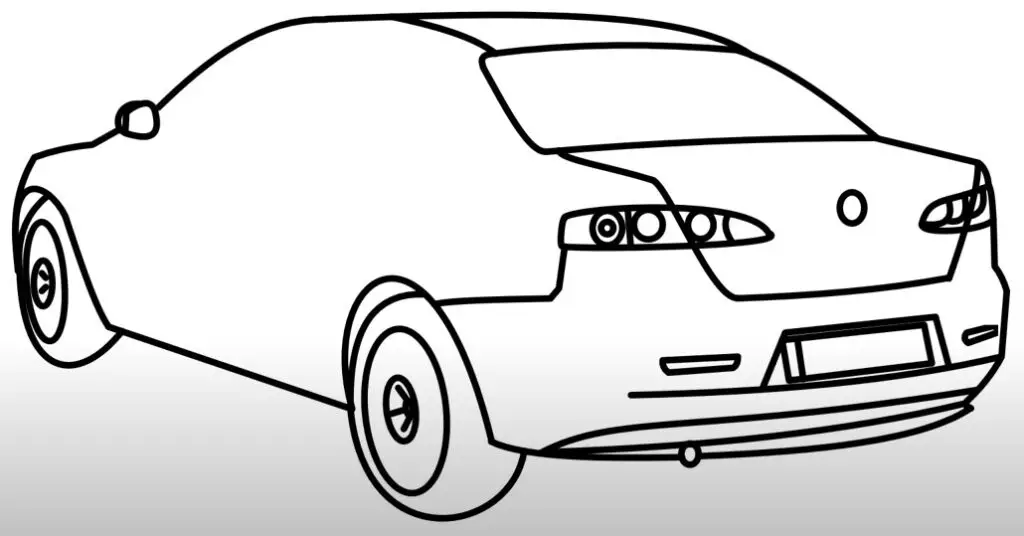
STEP 6: Add the Details of the Car
Giving detail to your sketch will give a precise and complete description. Thus, it is an important step during drawing anything.
You should look deeply at your sketch to ensure that every part of the car has perfect shape and dimension.

Your sketch should be as perfect as shown in the above sketch picture.
STEP 7: Draw the Windows of the Car
Now we will go through the procedure of drawing the car’s windows. All you have to do is:
- Draw a semi-circle but a little bit curved, as shown in picture 1.
- Again draw 2 semi-circles as curved from the side as shown in picture 2.
- Now draw three horizontal lines, one from the mid of both windows and extend them until the end, as shown in picture 3.
- The second horizontal line should be drawn from the bumper side, as shown in picture 4.
- The third horizontal line should be drawn from the front side, as shown in picture 4.
STEP 8: Create shadows and highlights for your car
To add value to your sketch, you have to shade it. All you have to do is:
- Take your pencil.
- Press your pencil slightly harder.
- Start moving it gradually.
- It will make a dark shadow.
You can use a pencil on your whole car sketch when you are not in the mood to paint it with another color, as shown in the below picture.
STEP 9: Finish touches for a realistic car look
The final touch is a finishing dash, so after completing your sketch. You should look and ensure all parts of your sketch car are prominent.
If you use a pencil and make a shadow, your final touch will be using a pencil.
If you want to color your sketch, your final touch will be after adding colors.
You can add any color according to your wish.
Expert Opinion
We all love to draw something unique. Experience artists can easily draw a car from the back, but beginners need clarification.
There is no need to get puzzled; you must follow the correct guidance.
First of all, you have to choose a car that you wish to draw then you have to complete your sketch material.
After that, you can go through all above mention points.
Drawing a car can enhance your motor skills, improve hand-eye coordination, increases confidence, and establish concentration.
I am an Automotive specialist. I graduated from Michigan with Bachelor in Automotive Engineering and Management. Also, I hold degrees in Electrical and Automation Engineering (BEng), Automatic and Industrial Electronic Engineering, and Automotive Technology. I have worked at General Motors Company for over five years as the Marketing Operations Production Coordinator. Now, I own my garage in Miami, Florida. I love cars and love to share everything about them with my readers. I am the founder of the Automotiveex blog, where I share everything about automotive, like car news, car mechanical issues, and anything else that comes up in my blog posts.

")


