Formula One (F1) racing is a thrilling sport loved by millions of people around the world. If you want to capture it on paper, I am here to help you.
The sleek and aerodynamic design of F1 cars is one of the things that make them so impressive. Have you ever wondered how to draw an F1 car?
In this article, we’ll show you a step-by-step guide on how to draw an F1 car like a pro.
These are the steps that we are going to follow:
- Gather basic materials – paper, pencils, markers, eraser
- Learn the anatomy of an F1 car – the cab, wings, and tires
- Understand the design of an F1 car – the different shapes, sizes, and colors of the car
- Learn the perspective of an F1 car – the angles and depth of the car
- Sketch the outline of the F1 car – use a ruler and measure the size of the car
- Add details to the F1 car – the windows, doors, bumpers, and tires
- Color the F1 car – use the correct colors to match the official F1 car
- Add shading and highlights – use pencils and markers to give the F1 car a realistic look
- Add the finishing touches – add the F1 logo and the driver’s name to the car
- Finalize the drawing – erase any mistakes and have a final look at the drawing
How to Draw an f1 Car
Gather Basic Materials
Before drawing, ensure you have all the basic materials you need. You’ll need the following:

- Paper.
- Pencils.
- Markers.
- An eraser.
You can also use a ruler to ensure your lines are straight and accurate.
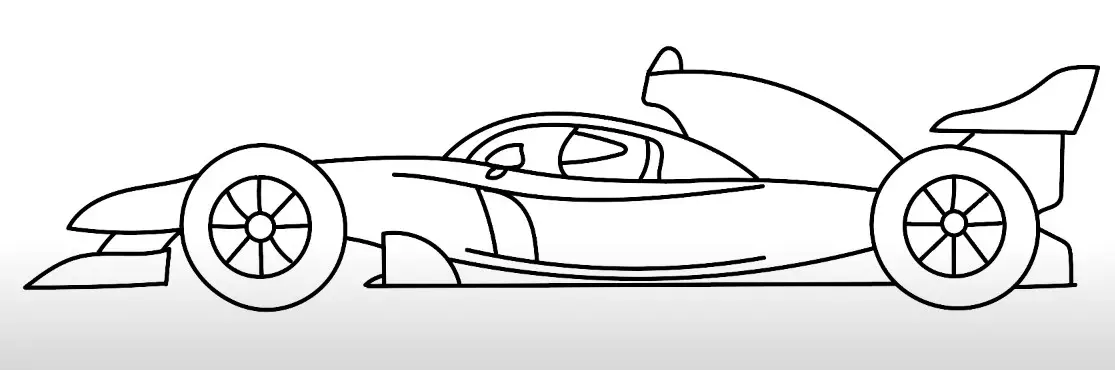
Learn the Anatomy of an F1 Car
The first step in drawing an F1 car is to understand its anatomy. F1 cars are made up of three main parts:

- The cab.
- Wings.
- Tires.
The cab is the cockpit where the driver sits, the wings help provide downforce to keep the car on the ground, and the tires provide traction and grip.
Understand the Design of an F1 Car

F1 cars come in various shapes, sizes, and colors. Some have a longer and thinner design, while others have a shorter and wider design.
The car’s colors can also vary depending on the team and sponsor. It’s essential to research the design of the F1 car you want to draw to make it as accurate as possible.
Learn the Perspective of an F1 Car

To draw an F1 car accurately, you need to understand its perspective. F1 cars have a unique shape that requires you to draw them from specific angles and depths. Please pay attention to the angles of the car’s body and the depth of its parts to make it look realistic.
Sketch the Outline of the F1 Car
Start by sketching the basic outline of the F1 car using a pencil. Use a ruler to measure the size of the car and ensure that the lines are straight and accurate. Remember to use light strokes so it’s easier to erase any mistakes.

- Firstly, draw a circle on your plain white paper. As shown in picture 1.
- Draw 2 angles on the left side of the circle. As shown in picture 2.

- Now draw a curve line from the circle’s right side. As shown in picture 3.

- At the end of the line, draw another same size circle. As shown in picture 4.

- Draw a straight horizontal line parallel to the first line. as shown in picture 5.
Add Details to the F1 Car
Once you have the basic outline of the F1 car, start adding details like windows, doors, bumpers, and tires. Use your references to ensure that your details are accurate.

- Draw 2 curve lines in the inside area. As shown in the above picture.

- Draw angles according to picture 2. It will look at wings.
- Draw a semi-circle and angle it. As shown in picture 3.

- Draw a curve line as shown in the above pictures.

- Draw a triangle as a side mirror. As shown in 6.
- Draw a circle as a helmet and a triangle inside it. As shown in picture 7.

- Draw a circle inside of the drawn circle. As shown in picture 8.
- Now draw another mini circle inside of the second circle. Draw a line all over the circle. As shown in picture 9.
Finalize the Drawing

Lastly, erase any mistakes and take a final look at your drawing. Congratulations, you have successfully drawn an F1 car!
Color the F1 Car

The next step is to color the F1 car. Use the correct colors to match the official F1 car. You can use markers or colored pencils to add color to your drawing.
Add Shading and Highlights
Add shading and highlights using pencils and markers to give your F1 car a realistic look. This will add depth and dimension to your drawing.
Add the Finishing Touches
To complete your drawing, add the F1 logo and the driver’s name to the car. This will make your drawing look more professional.
Personal Opinion
Drawing an F1 car requires a lot of attention to detail, an understanding of anatomy, and a design perspective.
With this step-by-step guide, you can draw an F1 car like a pro. Remember to take your time and enjoy the process!
Drawing an F1 car can be challenging, as these vehicles are complex and aerodynamic. However, with the right techniques and practice, anyone can learn how to draw an F1 car.
The first step is to gather reference materials, such as photographs or videos of F1 cars, to help you understand their shape and design.
Then, start with the car’s basic shape and work your way up to the details, such as the wheels, engine, and aerodynamic features.
Use guidelines to help you maintain proportions and symmetry, and pay attention to the curves and lines of the car to create a dynamic and realistic drawing.
With practice and patience, you can develop your skills and create stunning drawings of F1 cars that capture the speed and excitement of these incredible vehicles.

James Carter is an automotive blogger, reviewer, and technology enthusiast based in the USA. With a deep passion for cars and years of experience following the automotive industry, James focuses on delivering honest, well-researched content that helps readers make smarter decisions.