How to Prove Someone Vandalized Your Car | 6 Methods Explained

0

In today’s world, almost everyone has a car. People often spend thousands of dollars on them, affecting our everyday lives. However, they can also be very costly. Unfortunately, dishonest people out there may have no problem vandalizing your car. Manage your next move carefully or your car against vandalism. Automobile vandalism is a common crime at home or on the road. Here are a few cautions you can use to prove that someone vandalized your car.

A Simple Way To Prove Someone Vandalized Your Car:

When you park in a public lot such as a grocery store, there’s always a chance that you’ll come back to find that someone has scratched or damaged your car. Rather than sitting around and waiting for someone to return and take responsibility, you can take a few steps that are simple and easy to figure out who was responsible:

  • Get the license plate number of the culprit.
  • Take down any identifying marks or scratches unique to the vehicle.
  • Take pictures of the damage and tell the authorities about your experiences.

How to Prove Someone Vandalized Your Car

How to Prove Someone Vandalized Your Car

Method 1

One way to wipe out any doubt if your car vandalizes is to take a picture of it and upload it onto social media sites such as Facebook and Twitter. Have a friend or family member take a picture and record the license plate. 

If your car vandalizes, you’ll be able to see who did it and get the necessary information from the police. It’s essential to get the person’s license plate who vandalized your vehicle because it will help you identify them and possibly take legal action against them.

Method 2

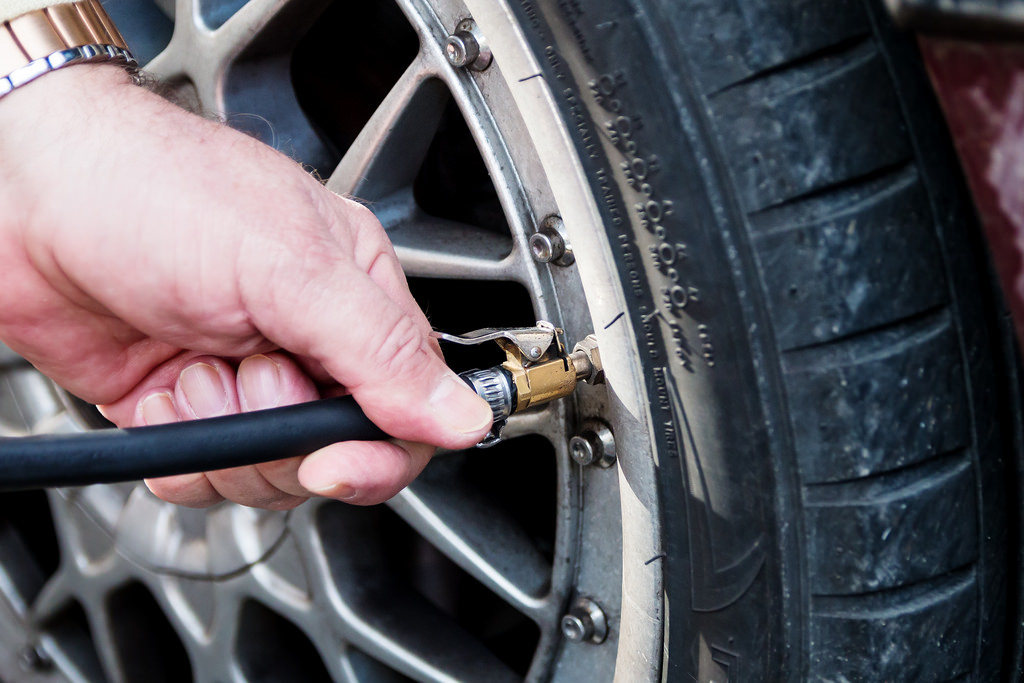
When you have to prove that your car vandalizes, you can check the car’s tires. Sometimes, bad people slash tires so you can’t drive and have little time to find a replacement. But, by examining the tires, you can see what’s going on. 

If the damage is too significant, there’s someone who’s messing with you. If the damage is low, the damage is probably from running into something. Seeing the injury is one way you can make sure you aren’t paying back an expensive car but an accidentally destroyed car.

Method 3

Proving that someone has vandalized your car can be complicated. It’s our car, and we know it better than anyone, but there’s no way to prove it unless you saw them do it! An excellent method to catch a vandal is to set up a security camera on your premises.

Now, you might be thinking cameras are only for professional security companies, but that’s not the case! There are low-cost cameras that can install inside your home or car. The best part is that they’re wireless! You can get them connected with your phone and watch everything happen in life.

Method 4

If someone has vandalized your car, it’s necessary to document all the facts possible. Take pictures of the vehicle in the damaged area. And all of the other sites may damage due to the vandalism. Next, find out if anyone saw who did it. Witnesses are a big part of the case against the vandal, so you will want to get statements from people who saw anything suspicious. 

If you can’t find someone who saw the act, you should at least find out how long it occurred because this will help show the recently-issued vandalism. Ensure you have evidence, a witness, and know who committed the crime before pursuing a case against the vandal.

Method 5

One possible way to prove that someone vandalized your car is to look for fingerprints on the vehicle. If fingerprints do not belong to you on the car, it could be evidence that the person who vandalized your car was someone else. Additionally, if there is damage to the vehicle that cannot explain by any other means, it could also be evidence that the car vandalizes.

Method 6

The best way to prove that someone vandalized your car is to look for physical evidence. It might include scraps, dents, or other markings on the car not present ahead. If you can find evidence suggesting someone was deliberately trying to damage your car, it will be substantial proof that they were responsible. You can also look at eyewitnesses who observed the incident may also consider.

Frequently Asked Questions

What Should You Do If Someone Vandalized Your Car?

The police report following auto vandalism would be crucial in clearing your identity. Vandalism is a heinous crime, and the police strive to apprehend the person who committed it. Your insurance provider should also notify you. Vandalism can cause expensive damage, and your insurance company may help pay for the repairs.

What Is Considered Vandalism To A Car?

The definition of vandalism can be pretty subjective, but it understands as damage or defacement inflicted on general or private property without the owner’s consent. It can apply to any car, from scratching the paint to breaking a window. Vandalism is often motivated by spite or mischief but can also commit ignorance or carelessness.

Will Insurance Cover A Vandalized Car?

If an individual’s automobile vandalizes and the damages are less than the deductible on their insurance policy, their insurance policy would typically cover the damages. However, if the damages to the automobile are more than the deductible, then the individual would be responsible for paying the additional costs themselves.

What Is The Charge For Vandalizing A Car?

The charge for vandalizing a car can be one misconduct or the other a misfeasance. It depends on the value of the damage done to the vehicle. Vandalism is the intentional destruction or damage of property, and it may charge as a crime if the damage exceeds a certain amount. In some states, the charge for vandalizing a car describes as “car tampering” or “vehicle mischief.

Conclusion

In conclusion, if you feel your car vandalizes, there are a few ways to prove it. By gathering evidence and filing a police report, you can help ensure that the perpetrator is held accountable for their actions. If you have any cross-questions or require help filing a police report, please contact your local police department.

How to Let the Air Out of a Tire | 9 Steps You Must Know Now

0

If you have an excess amount of air in your vehicle’s tires, you need to pass them, or you may need to deflate them. The tires of cars and motorbikes have valves in them, as they control the air in and out of the tire. Once you find the valves on the tires, letting the air out of the tire is as easy as you follow the proper steps.

How to Let the Air Out of a Tire

How to Let the Air Out of a Tire

Locate the valve on your tires

There is a valve between the spokes near the middle of the tire. The valve seems like a short 1 to 2 inches tube protruding from the vehicle’s tires, as it has a metal or black cap on the end of the stem. The cap works to remove the dust and dirt from your valve. 

Replace the cap on the valve

Now the next process is to replace the cap on the tire valve, as it will uncover the metal part of the valve. The valve on the tire is like the round hole having a pin in the middle of the tire. Place it in the plastic bag safely to avoid losing it when removing the cap. 

Check the pressure on the tires

To check the air pressure of the vehicle tires, attach the pressure gauge onto the valve on the tires and screw it tightly into the place. It should show you the reading of the tire pressure per square inch or PSI in terms of pounds.

Check the manual from the company provided to see the recommended pressure in the tires. You can get the pressure gauge to check the tires’ pressure from any automotive store or online. 

Press the tip of the screwdriver on the metal pin

In the middle of the valve, there is a thin metal pin on the tire’s surface. You can also opt for the nose pliers; use a pair of a needle, or any other thin and small tool. Air will begin to discharge from the valve when you exert pressure on the pin. If you want to stop it from deflating, lift the screwdriver off the pin to stop it. 

Jack the car up 

To deflate the car or truck tires entirely without using a jack can destroy your tire and rotors. There is a point on the side of the tire for fixing the jack, so use the lever to jack up the car to lift it into the air. In this way, you can remove the air from the tire, as if you do not know how to jack up the specific model of the car, get help from the user manual. 

Lose the metal pin 

Use any sharp think like pair of thin needles of 5 inches in length and nose pliers; turn the metal pin of the valve in a counterclockwise direction. The air in the tires will get out more quickly and flow than if you press down the pin.

If you want to deflate the tire faster, this method is the best. Do not forget to fasten the pin back into the tire’s valve once you complete the process. 

Fit the end of your tire pump

After finding the tire’s accurate pressure, on the interior side of the tire, press the end of the tube tire on the end of the valve after you miss it. Put the lever under the tire pump and read the number of pressure levels on the vehicle’s tires. If you notice the excess air in the tires, you should release the pressure from them with the help of the gauge.

Remove the tire pump

Remove the pump if you want to deflate the tires and release the excess air, then flippant up the switch on the back of the pump in the upward direction and twist up the pump from the valve. When you exert pressure on the tip of the valve to reduce the tire, the air will discharge from the tire. You will feel the sound and hear the shoot-out of the van when you press the valve cap. 

Push the tire down to remove air  

The quickest way to remove the air from the tire is to put the tie on the ground and exert a push on it. This will release the air out of the tire faster if you press the valve cap.

Frequently Asked Questions

How to let the air get out of a tire?

Get a flat head screwdriver. Now start opening the metal pin by pressing it inward. In this way, the stem will release the air pressure. Remove the screwdriver, and then check the tire pressure with the help of the gauge. Repeat this procedure until you get the needed tire pressure.

How do tires seal?

The sealant used for tires is a fibrous liquid put inside your tire. When the tire gets punctured, all this sealant is released. As a result, the fiber builds up and mixes to form a flexible mass.

Where does the air go into the tire?

When you fill the air in the tire, it directly goes into the tire through the valve stem. When you fill the air, you can hear air sound. If you notice air leaking or spraying out from the tire, you should check the connection between the air hose and whether the tire valve is safe or not. 

How do tires stay inflated?

The inner part of the tire is made of a rubber compound that attaches to the tire to hold air pressure inside the tire. Three parts, including tire bead, inner liner, and bead filler, firmly keeps the air in tire walls.

Conclusion

From the above-discussed steps, it is clear that you can let the air out of the tire by simply pricking the tire with a knife or any other sharp thing like a nail or pin. While putting the sharp thing into the tire will let you know the release of the air from the tire by simply shooting the air from the tire.  

How to Let the Air Out of the Tire without Gauge | 8 Steps to Follow

0

Letting the air out of tires without the gauge to retain the suggested tire pressure may be the easy way of doing it to be on the safer side and more comfortable. To control and let the air in the tires can be accessible by locating the valves on the tires; once you find them, you can do the process easy, even without a gauge. Because driving with inflated tires may be overwhelming and become brittle and stiff, thus causing a lot of vibrations damage to various vehicle components, as it is not an easy task to do.

So if you want to see how to get the air out of a tire without using a gauge, keep reading the valuable information.

How to Let the Air Out of the Tire without Gauge

how to let the air out of the tire without gauge

Lift the car

Without using a gauge, deflating the tires completely when they do not get suspended in the air can cause severe damage to the tire itself. And the other components of the car like discs and wheels. The points are the points of intersection of the car’s two solid lines.

The right front point is located on the centerline between the two solid lines, while the left rear point is located to the right of the centerline. The way these points are located depends on whether or not they are facing forward or back when looking at the car from each side.

Put the jack under these points and raise the car until you slide the jack stands on all of its corners. Then slowly take out the jack from the vehicle and remove it under it, so the car comes to the place securely and independently can stand on the wheels.

Search for the valve stem

Like this, the way to release the air out of the tire without the gauge finding the valve stem on the vehicle’s tire. The valve stem can hold the metal pin that you unscrew to completely release the air out of the tire. The steam valve is present between the spokes that are sticking out the inner rim of the car’s wheels.  

Remove the cap covering the valve stem

You can use the cap on the valve stem made of rubber, plastic, or metal to prevent the dust and dirt from getting inside the valve on the tire. To remove the cap from the valve on the tire’s stem, you should unscrew it in the counterclockwise direction to reveal the metal pin from the tire valve.

Extract the metal pin

When you remove the metal pin from the tire valve, you will deflate the tire faster and let the air released from the tire at once. With the help of a needle nose plier or any other sharp thing, extract the pin by grabbing it, then rotate it in the counterclockwise direction.

Screw the metal pin back into the place

When you plan to release the air out of the tire, screw up the metal pin back into the valve not to misplace it. With a screwdriver, you can also release the air from the tire. Find the metal pin of the valve in the tire surface and press the screwdriver tip in the valve. You can replace the screwdriver with the nose plier and needle.

You can feel the air pending out of the tire at this level when you push on the latch. When it reaches the equilibrium pressure, lift the screwdriver out of the valve.

Use the tire pump

When you close the valve cap on the valve, you must mount the tire pump into the valve component. To make the tire pump work, place the lever on the backside of the machine.

The tire’s current pressure and air amount will display on the computer screen in pounds. When the tire’s pressure increases from the equilibrium pressure level, you will see the air coming out from the tire.

Pull out the tire pump

Pulling out the tire pump will deflate the tire of the vehicle. You should not over-inflate the tires o the vehicle as it can cause damage and dangerous situations. To remove the pump from the tire valve, flip the switch back into place and unscrew it.

Press the valve head down

To release the air out of the tire, you will first reduce the air in the tire by pressing the valve down. The lid will be loose, releasing the significant vapor release. You will find this process very time-consuming and by doing it on the ground, gently press it and firmly hold the tire. At this level, the air will release from the tire without waiting long without using the gauge very successfully.

Frequently Asked Questions

Do new tires feel different?

The new tires give you a natural feel and tread maximum depth. The new tread is smooth, stiff, deep, and can give you a thick cushioning feel between you and the road.

How long are tired well for?

On average, people drive between 12000 to 15000 miles a year. The long-lasting tires depend on maintenance, driving style, conditions, an average all-season tire and can last three to five years.

How come new tires have hair on them?

The tiny rubber hairs are a by-product of the tire manufacturing company. In tires, mold rubber enters, and air pressure forces the liquid rubber into every crevice and corner; mold rubber must escape small air pockets.

What is the right amount of air to put in the tires?

Almost every vehicle, primarily cars, comes with a sign or marker positioned on the car’s interior on the driver’s side door. The sticker will tell you the recommended air pressure for your car. The information about the tire pressure is in pounds’ square inch, also referred to as PSI.

Conclusion

The considerable air and balanced air pressure will help your vehicle work better. It also won’t consume as much fuel. Therefore, you must check for the amount of air in the tires and if it is excess from the advised level, let it out from the tire either by using the gauge or the gauge.  

How to Keep Birds from Pooping In Your Car | 8 Awesome Methods

0

You value observing the birds, and you enjoy them so intensely that you desire to rescue them. However, your love for birds turns into hate once you notice their droppings on your car. The final thing you want to see after a long day at work is a bird pooping in your vehicle. You want to keep those birds away. You want to keep them away from the whole neighborhood. Solutions for how to get them to stop doing this can vary. Some people think hanging wind chimes will scare them off, but that doesn’t usually work. This blog will guide you on steps to keep birds from making your car their toilet. In this guide, I will teach you how to keep birds from pooping in your car.

Birds might be a pretty common sight in your area. However, although cute, seeing them perched on your windshield can be a nuisance. There are multiple features you can do to deter them from doing this. The numerous typical methods are to place up a bird branch close your auto.

It will keep the area populated, discouraging them from coming near your car. Another option is putting up a scarecrow. It will deter them by making it seem like another creature is already protecting your vehicle.

How to Keep Birds from Pooping In Your Car 

How to Keep Birds from Pooping In Your Car

Some Additional Methods to Maintain Birds from Pooping On Your Auto

Method 1

There are various ways you can try to avoid bird pooping in your car. One of them would be to avoid bird-heavy areas. It is the numerous prominent item and is ordinarily reasonable instead step. Another way to avoid it is to repel them using a car anti-bird solution. The instructions say that you need to spray the fluid outside your car and your windows. It will keep them away and make your car clean and pooping-free!

Method 2

One effortless method to maintain birds from pooping on your auto is to establish a bird barrier. It can be as effortless as a fake owl or hawk, found at most hardware stores. The argument is that the coalition will frighten the birds, making no extended feeling of the necessity to poop on your auto. Another option is to use a netting system to cover your vehicle and prevent the birds from getting close enough to poop on it.

Method 3

A car cover protects the car from various external elements that can damage the paint or interior. One such element is bird droppings. The droppings can etch the paint on a vehicle if left uncleaned and cause an unpleasant smell inside the car. A car cover will keep the droppings from hitting the car and clean the interior.

Method 4

“Don’t Park Under Trees to keep birds from pooping on your car” is a simple way of telling people that they should not park their cars under trees because the birds that live in the trees will defecate on the vehicles. It is such a problem because the bird droppings are acidic and can cause significant damage to the paint on cars.

Method 5

The use of CDs to prevent birds from pooping on cars is a form of folk wisdom passed down for generations. Using this method, the CDs will create a noise that scares the birds away and prevents them from landing on the car. Although there is no authentic proof to support this claim, many people have found it adequate to clean their vehicles.

Method 6

You should avoid parking close to the edge of buildings because birds will often poop on cars that park in that location. The bird droppings can corrode the paint on your vehicle and cause other damage, so it’s best to avoid the risk altogether. Parking further away from the edge of the building will reduce the chances of this happening.

Method 7

One way to keep birds from defecating on your car is to cover the side mirrors with some material. It can be cloth or some other type of netting. It aims to control the birds from lighting on the mirrors. Another way to avoid this is to install a bird deterrent, such as a fake owl or hawk, near where the birds congregate.

Method 8

Installing a bird scaring kite is one way to keep birds from pooping on your car. The kite creates a visual deterrent that scares the birds away, preventing them from landing and eliminating the mess. While this method may not be 100% effective, it is a relatively cheap and easy solution that can use in conjunction with other methods.

Frequently Asked Questions

Why Are Birds Constantly Pooping On My Car? 

Birds use the restroom wherever necessary, which unfortunately includes cars for some people. The droppings can damage the paint job and lead to an unpleasant odor. In addition, birds can carry diseases that can spread to humans and other animals.

What Attracts Birds To Poop On Cars? 

One possibility is that birds are attracted to the salts and minerals in car exhaust found in bird droppings. Another idea is that birds view cars as another place to perch, and they mistake the reflections of trees or sky on the car windows for natural branches or patches of blue sky.

What Is The Best Bird Deterrent? 

The best bird deterrent is a hawk. Hawks are natural predators of birds, and their presence will often scare away other birds. Several methods can deter birds, including bird spikes, netting, and noise deterrents.

Does Ceramic Coating Protect Against Bird Poop?

Ceramic coatings are not 100% effective in preventing bird droppings from damaging the underlying paint, but they offer a degree of protection. The droppings can still cause staining and etching, but the coating will help to minimize these effects.

Conclusion

In conclusion, there are a few ways to keep birds from pooping in your car. One is to install a bird deterrent, like a scarecrow or reflective tape. Another is to keep a clean car, so the birds don’t see it as a suitable place to poop. Finally, you can also try to scare the birds away by making loud noises or using a water hose. No matter what method you select, it’s essential to be consistent and persistent to keep the birds away.

How to Install Anti-Rattle Clip-On Brake Pads | Simple 4 Steps to Follow

0

When your car brakes start to make a noise, it’s because the brake pads have started to wear down, and the alloy backing is scraping against the metal rotor. You can buy anti-rattle clips to help fix this problem. Moreover, if you want to stop your car from shaking or rattling, then you should try installing anti-rattle clips on your brakes—these clips style to reduce the noise caused by vibrations. Let’s learn how to install anti-rattle clip-on brake pads.

To hook up the anti-rattle clips, you can use elastic straps. They are often used to prevent the brake pads from rubbing against each other during braking. These clips are also known as anti-rattle clips.

The installation process for anti-rattle clips is straightforward and can do in a few minutes. You need to follow some steps to help you eliminate all kinds of noises that may occur when you drive your vehicle.

What Are Anti-Rattle Clips?

How to Install Anti-Rattle Clip-On Brake Pads

Anti-rattle clips are small pieces of metal or plastic inserted into the spaces between the moving parts of a mechanism to prevent them from rattling against each other. They use cars, machines, and other devices to reduce noise and vibration.

This article will express installing anti-rattle clips on your brake pads using a few simple steps.

How to Install Anti-Rattle Clip-On Brake Pads?

How to Install Anti-Rattle Clip-On Brake Pads

Step 1: Remove the Old Rattle Clips

You need to remove the old rattle clips before installing new ones. If you don’t break in this way, the brake pads may damage. To dismiss them, you have to use a pair of pliers. Unlock the brake caliper from its clamp using a socket wrench. Pry the bib from its brake pad’s retaining pins by gripping its caliper with a screwdriver. Pull the brake pad off the caliper and discard it.

Step 2: Install the New Rattle Clips

After removing the old clips, you need to install the new ones. The new clips are available in various dimensions and structures. You can choose between several options. To install the clips, you first need to open up the box containing the clips. Then, please take out the pins and place them onto the brake pads. Finally, close the box again.

For this, Slide the release knob for the new brake pad into the anti-rattle clip. Line up the notches on the metal backing plates on the inner portion of the anti-rattle clip with the gap on the brake pads.

Step 3: Adjust the Position of the Clips

Once you have placed the clips on the brake pads, you need to adjust their positions to fit perfectly. You can do this using a screwdriver. Insert the brake pads and the anti-rattle clip into the middle of the caliper. Press the caliper pistons into the caliper housing via the flathead.

Step 4: Use a Wrench to Tighten the Screws

Finally, you need to tighten the screws with a wrench. Make sure that you apply adequate pressure so that the clips stay firmly in place. It would help slide the slots on the top of the brake caliper. The brake pad uses a backing plate fastened.

Verify that the clips attached to the strain align with brake pad holes. Slide retaining pins through the caliper, brake pads, and anti-rattle fasteners. Tighten the retaining pins with a screwdriver. Install the brakes onto the vehicles.

Hence, Make sure that you use calipers and brake pad anti-rattle clips. If you don’t attach the brake pad anti-rattle clips to your car’s brakes, the brake pads will rattle, causing noise at low speeds and potentially damaging them. Brake pad anti-rattle clips can remedy this issue and are inexpensive and easy to install.

Frequently Asked Questions

How To Install Brake Pad Clips?

There are different ways to install brake pad clips using a brake pad clip tool. This tool helps hold the bolt in place while fastening the brake mechanism. Another way to install brake pad clips is to use a pair of pliers. If you have a hole and need a patch with it, you can use a hammer and a nail.

How To Change Brake Pads Without Removing The Caliper?

It’s sometimes feasible to change the brake pads without terminating the caliper. One way is to use a brake pad spreader tool to push the old brake pads out of the caliper. Another way is to use a C-clamp to clamp the caliper shut and then use a screwdriver to pry the old brake pads out of the caliper.

To replace brake pads, first, remove the wheel from the car. Then, drag the brake calipers and pull off the brake shoes. Next, remove the old brake pads and clean the brake rotor. Finally, install new brake pads and put these brake pads back together.

What Is the Purpose of the Anti-Rattle Clip? 

The anti-rattle clip prevents rattling noises when the vehicle is moving at high speeds. It does by using a rubber band around the tiller that controls the motion of the steering wheel. The anti-rattle clip can use on any size backpack. It is easy to use, and it doesn’t affect the fit of your pack.

How Long Does It Take To Install Anti-Rattle Clips On Brake Pads?

Car brake pads normally take roughly ten minutes to install anti-rattle clips. The pins help keep the brake pads in position to lower noise and make the car quieter. You can self-manage the task with a drill press. You can use a hammer to replace an electric drill. Moreover, when you do not have a proper toolbox, you can use a credit card to maintain the clip in place for your comfort as you tighten it up.

Final Thought

In conclusion, installing anti-rattle clips on brake pads is a quick, easy way to improve the performance of your brakes and reduce annoying rattles. If you’re having trouble with your brakes, or if they seem to be noisy, try installing some anti-rattle clips and see if that solves the problem. By following the steps outlined in this article, you can ensure that your brake pads are correctly attached and that annoying rattles eliminate.