How to Reset Miles on the Car | 3 Step Guide By Our Expert

0

Do you know how to reset miles on the car? Opting for a secondhand car is cost-effective, but this option has a significant chance of being ragged off if you are not cautious and attentive. One of the most common issues is the odometer fraud that most sellers do while selling these cars.

A digital odometer is an instrument that you can use to measure the distance of your vehicle while traveling. The odometer indicates the measurement in the form of mileage.

How to Reset Miles on the Car

How to Reset Miles on the Car

Most of the old car sellers rest the car’s odometer so that the car appears newer and thus demands more money from the purchaser. There are two primary and common reasons that you may want to reset the mileage through the odometer in your car.

There are two possibilities here: either manual mileage resets or automatically happens in unusual cases, or you want to commit fraud.

So if you want to identify how to reset the mileage on the car, follow the below-given steps.

Step 1: Install a new instrument cluster

Most Japanese automakers display the vehicle mileage on the instrument cluster rather than on the car computer. The car’s odometer will indicate nill mileage when you substitute the mechanism for a cluster with the brand new one.

So if you want to reset the miles on the car, you should replace the instrument cluster with the old one of another car, then the instrument cluster will show the miles of the original car.

Since replacing the instrument cluster is illegal, it is legal to reset the odometer. It means that replacing the odometer without filing the paperwork and documents is illegal, as some laws and rules prevailing in the United States of America prohibit resetting the odometer.

Therefore, the legal way to reset the car mileage is to replace the instrument cluster but not resetting the odometer is to show the original mileage from the previous cluster before replacing it.

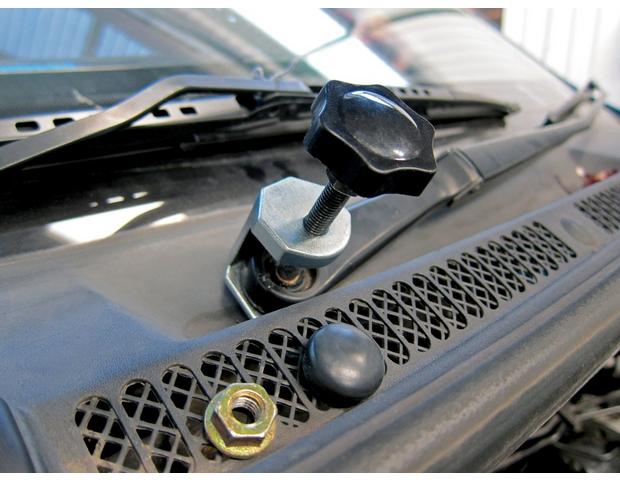
Step 2: Manipulating the knob

This is the most modest and easy way to reset the miles on the car odometer. Find the knob on the instrument cluster, as this knob has several functions to perform, like showing the remaining fuel percentage and the temperature fluctuations and calculations.

Interestingly it is essential to mention that this knob can do the task well if you can reset the miles on the car. With the use of this knob, you can reset the miles on the car odometer by pressing and fielding down the knob for a few seconds, and when the fuel economy comes up, the odometer of the car will reset to zero.

Step 3: Reassemble the odometer

If you are a mechanic and gear head about the car components, resetting the car mileage through the setting odometer is easy, especially on old vehicles.

You have to take the familiar mechanic tool like a screwdriver or pliers, take out the instrument cluster, and reset the value of the miles by hand before reassembling it in the car.

The car and vehicle manufacturers undoubtedly have adequate knowledge about these tricks, so they plan to add a tamper-proof seal. In other words, if you have the tamper-proof seal, resetting the car’s odometer without being caught won’t be easy.

Therefore, if you plan to manipulate the odometer readings and reset the mileages, you should make sure to match the readings with the life span of your vehicle.

Most cars come with an average life expectancy of car tires is 25 miles. Therefore, it is easy to detect the odometer rigging by looking at the vehicle’s tires. Old tires will cause the mileage to read 15k.

Frequently Asked Questions

How do you know that you have a tempered odometer in your car?

Suppose anyone tries to temper your car’s odometer. In that case, its objective is to increase the vehicle’s sale value on new cars like Ferrari, which comes with the sets of odometer reset software. So if you want to check the tempering in the odometer, you can check the odometer physically. Carefully check the odometer.

All the numbers should be readable, well-aligned, and crooked. Next, you should check the car’s tires in terms of life span. Place the penny into the tread tire facing the Lincoln head down. If the tire tread covers the Lincoln head, it will still ok, and it will be 2/32 an inch.

How do I fix the car mileage on the odometer?

Nowadays, vehicles come with speed sensors that can read the miles of the car to check the coverage of distance. A speed sensor is an electronic device located on the car’s transmission.

So if your speedometer is not functioning well, slide under the car and replace the sensor. Suppose you are using the old vehicle with an analog instrument cluster. In this case, you can replace the instrument cluster, check the gears that cover the miles, and change them if needed.

How does the odometer calculate distance?

These days most odometers work by recording the wheel rotation. Multiply the number of wheel spins by the tire circumference to get the distance covered by the vehicle. You will get the tires’ circumference by multiplying the tire diameter by Pi.

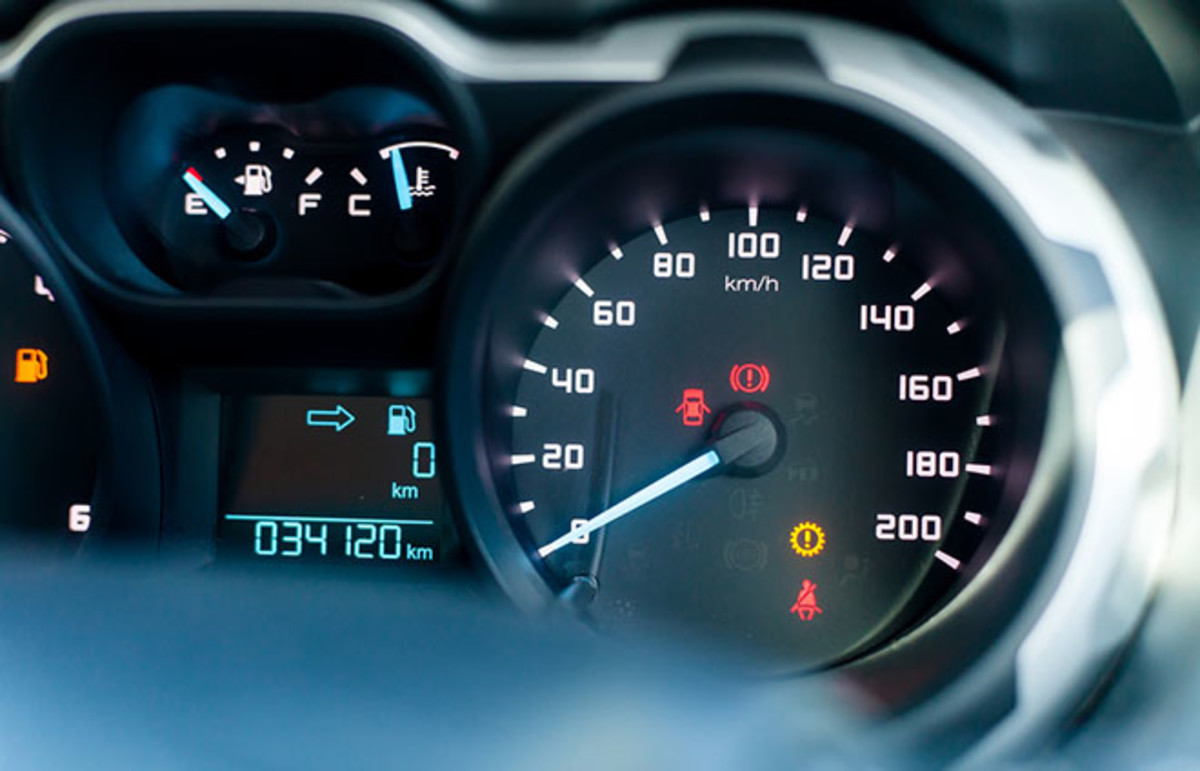
Where can I find the odometer reading?

To read an odometer, look for a small rectangle that usually contains five to six numbers, and it is near the speedometer. The odometer can be digital if you have a new vehicle, but it will be a physical or mechanical set of numbers in older models and less luxurious.

Conclusion

Now when you know the resetting of mileage on your vehicle and how to reset the odometer, it will be easy to detect the odometer fraud that most of the sellers of the cars do for increasing the vehicle’s resale value.

The important thing is that your car’s odometer should be in working order if you want to reset the mileage. Therefore, it is essential to go through the above steps to reset the miles on the car and follow the process carefully to prevent fraud.  

How to Remove Windshield Wipers Arm | A Full Step by Step Guide

0

Unfortunately, your windshield wipers will stop working every time it rains. However, these instances are just a reminder to keep your windshield wipers fit and in good condition. So, since you have broken wipers, how do you get them removed? This blog post breaks down the different steps on how to remove windshield wipers arm.

How to Remove Windshield Wipers Arm

How to Remove Windshield Wipers Arm

First, you need to remove the windshield wipers arms. To remove the windshield wiper’s arm, you have to open the hood of your car. After that, you need to unbolt the windshield wipers arms from the vehicle’s body. After removing the components, you need to pull the blades off. 

Then, you need to remove the old motor. Next, you need to attach the new engine. Finally, you need to put the arms back on the car’s body and re-bolt them.

Different Types of Windshield Wipers Arm and Ways to Remove Them

Different Types of Windshield Wipers Arm and Ways to Remove Them

Center-Mounted Wipers

Center-mounted wipers arms are not standard in the United States, but they use in European countries. Wiper arms in these vehicles mount on the center of the windscreen. The wiper arm mechanism is responsible for both wiping and lifting and, in some models, also for the intermittent function. 

You will have to eliminate the center console to access the bolts that hold the wiper arms in place. You should then loosen the wiper arms and remove the wiper arms from the mounting points on the windshield. You need to unscrew the bolts on the new components and put the wipers in place.

Rubber Blade Wiper

Those rubber blade wipers arms are rubber blades attached to the blade arms with 3M double-sided glue. The bottom and the top part of them are rubbery and flexible; that’s why the rubber blade wipers arms bend. You will need several knives and possibly a pair of hot water and a hairdryer to remove them. Place the hot water in a pot. 

Then secure the rubber blade wiper’s arms on a flat surface and place the blade into the hot water. The heat will loosen the rubber blade wipers’ arms from the blade arms. After that, use a hairdryer to bend them back and forth, making the glue dry up and bind more minor. After that, use a scissor to remove the arms altogether.

Scissor Style Wiper

This guide is for you if you have an older vehicle with scissor-style wipers arms! If your wiper arms are in good condition, you can easily replace the wiper blades. To remove your wipers, follow these steps:

  • Remove your cowl and set it aside.
  • We use a wrench to release the nut on the post. Be careful not to lose too much, or the nut may fall off. After that, pull the nut off the post.
  • Turn the wiper arm counterclockwise to loosen it.
  • Remove the wiper arm and eliminate it with your new wiper when that does.

Single Arm Wiper

Taking off single-arm windshield wipers can be difficult and time-consuming if you don’t do it correctly. You can use your hand or get a wrench to help you get it off. Sometimes they can break in the process, but you can remove them without any issues if you are careful. 

Wiping your windshield can be difficult without your windshield wipers. There are many reasons you would want to remove them, for example, if the car uses a lot of battery power or you don’t have them.

Double Arm Wipers

If you need to remove your double arm wipers, you’ll have to check your owner’s manual. Foremost, study if it is feasible to vacate the wipers from the auto. Next, check the area around the wiper arms to ensure nothing will obstruct the wiper blade once it is released. 

After you finish these steps, you can remove the wiper arm using the wiper arm removal tool. Make confident you pull the component up and force it inwards. After doing this, you can remove the specific washer and push the blade out of the way. You can now use the other washer to make the blade back into place.

How To Remove Windshield Stuck Wipers Arm?

How To Remove Windshield Stuck Wipers Arm

The wiper’s arm may get stuck in the windshield because the pivot hole in the arm eroded, and the cape got stuck in a jam. The preferable tool is a flat-head screwdriver. Open the engine hood and push the stuck arm up to retract. However, first, check whether the wiper arm froze to the windshield. 

Frequently Asked Questions

How Do You Remove Rear Wiper Arms?

Removing the rear wiper arm is done by loosening the nut, which can find on the top of the lever that allows you to control the arm. The nut needs to reduce until it is loose enough for you to remove it from its position, and then after this do, you can remove the wiper arm.

How to Remove Wiper Arm without Puller?

First, remove the cowl and locate the wiper arm shaft found at the top of the windshield. Then, please take off the two nuts which hold it in place. Next, heat both nuts with a torch until they are too hot to touch.

How to Remove Windshield Wiper Blades?

The wiper blades remove if the car has a recessed lip to rest the edge. If this is not present, the blade can push out from under the rubber boot by gently lifting it. The wiper blade should replace every six months because they made of latex that dries out and ceases to function if left too long.

What Is A Wiper Arm Repair Kit?

A wiper arm repair kit uses when the mounting thread or other parts fail. The kit includes a new wiper arm, mounting screw, and windshield washer hose. These kits can find at any local auto parts store for under $10. Some kits come with instructions for installation, while others do not require any tools.

Conclusion

The wiper’s arm is a vital part of the wiper system. It merges the wiper to the wiper engine found in the car’s motor container. It is also where the wiper blades rest when they are not in use. You would need to remove the windshield wiper’s arm, including changing the blades, repairing the arm, or replacing it entirely.

How to Remove Sticky Residue from a Car Dashboard | Expert Guide

0

If you have a sticky dashboard in your car, your manufacturer should repair it. Moreover, it pays attention to how it appears so not only to prevent it but also to increase the dashboard’s life. You should also find that if your vehicle comes with the coverage of any repair program of the insurance company, and if it does not, you should resolve the problem by yourself without damaging your dashboard and going to some expensive repairs. In this guide, I will teach you how to remove sticky residue from a car dashboard.

How to Remove Sticky Residue from a Car Dashboard

How to Remove Sticky Residue from a Car Dashboard

The first and most valuable option for cleaning the sticky dashboard is to hire the services of the insurance company to repair it, but if you want to have the quick fix follow the process in step by step given below:

Gather the materials

To clean your car’s dashboard, you will need wipes of cloth, lukewarm water, a soft bristle brush: vinyl upholstery cleaner, and a scraper made of plastic.

Step 1: Remove all the things from the dashboard

To prepare for the cleaning process, remove all the things and accessories from the dashboard.

Step 2: Open the windows of the car

Open up the car’s windows so that when you start the cleaning dashboard, it should get the fresh air in the car and ventilation well. 

Step 3: wipe the surface of the dashboard.

While it may be a complex process, the piece of cloth can leave the fibers of cloth on the surface of the dashboard. It is necessary to get rid of the significant portions of dirt and debris that may break on the sticky surface of the car dashboard.

Step 4: Make the solution of soap and warm water.

Now make the liquid solution by mixing warm water and soap. Stir the solution until it becomes soapy, as the solution should not be of exact ratio. If you find less foam in the water, you can add more soap to it according to your need.

Step 5: Wipe the dashboard with a wet cloth

Dip the pieces of cloth in the soapy water and wipe the surface of the dashboard with it. Do it many times until the surface of the dashboard is no longer sticky. Make sure that you use separate pieces of cloth every time to ensure that the dirt and debris do not transfer from the dirty cloth and come back on the dashboard. Wring the cloth many times to remove the excess water from it to not damage the car’s electronic systems.

Step 6: Use a scraper

If you have an excess amount of dirt and debris on the top of the car dashboard, you may need a plastic scraper or anything in flat shape to scrap the material without ruining the dashboard. If the issue remains even after scraping out the dashboard several times, you have to check the car with a professional detailer because homemade solutions often do not work.

Step 7: Allow the dashboard to dry

Your car’s dashboard should dry in the natural air, or you can use the paper towel to dry it by lightly patting down the wet spots of solution. 

Step 8: Apply vinyl upholstery solution

By following the instructions given on the chemical, use a vinyl upholstery cleaner on the top surface of the dashboard to clean it and offer it the required finish.

Step 9: Wipe the water-based vinyl protectant

Now apply the water-based vinyl protectant on the surface of the dashboard with the help of a soft cloth or rag to blow out the solution of the cleaner. Do not use and rely on the silicon sealant because the stickiness on the dashboard becomes worse with it. 

If all these tips fail to clean the dashboard, replacing the dashboard with the new one will be a great option. In most cases, you may also buy a band-aid solution by mounting the dashboard cover. 

Step 10: Apply the interior detain spray.

Spray the even layer of detailing product on the plastic panels and dashboards. Use it in the light and circular motions to remove the strains with the scrubbing pad or microfiber towel to break down the debris on the dashboard. 

Step 11: Spray the conditioner on the dashboard

Now take a breath to admire your handwork as you will notice that the spotless dashboard will entirely change your dashboard’s look. The interior protectants come with conditioning agents and elements and ultraviolet inhibitors that are the best option to keep your dashboard from drying, thus protecting your car interior, especially the dashboard. 

Therefore, use the quick and easy inside and outside protectant and conditioner for your dashboard to keep it neat, clean, and shiny. 

Frequently Asked Questions

Why does my dashboard feel sticky?

The reason behind the stickiness of your dashboard lies in the high temperatures and the exposure to sunlight, which is the leading cause of the stickiness of your car dashboard. The surface of the dashboard can be sticky due to the release of the toxic chemical odor, a yellowish gluish compound that is gummy in texture.

How can I clean my car dashboard?

Vacuum the whole dashboard with the soft brush attachment. Mix the simple green solution and apply it to the piece of cloth. Use the small brush to clean the dashboard knobs. Rub the dashboard surface, close areas, rinse and wash with clean water.

How do you eliminate sticky residue from car plastic?

Saturate the pieces of wipes or cloth with lukewarm and soapy water, white vinegar, or any cleaning compound. Place the duster on the region and allow for the solution to drench the adhesive. Wipe away all the solution, the sticker, label glue with the cloth. 

Conclusion

By following the steps specified above, you can quickly get rid of sticky residue from the dashboard. If your car comes under the insurance company’s repair and maintenance coverage, it will be the company’s responsibility to keep your car clean. 

Alternatively, you can use these home remedies and DIY methods to eliminate the sticky residue from the dashboard. If you use the protectants and conditioners, it can enhance the life of the dashboard and its natural glow and shine.

How to Remove Shear Bolts | A Step by Step Guide

0

The hooks are one of the numerous crucial parts of a plane. They hold the aircraft together, act as a safety backup, and make the plane look good. The first rivet on an airplane is called the Shear Bolt. That find on the facade of the fuselage only onwards of the cockpit. It may seem like a relatively unimportant component, but it is an essential part of the aircraft. This blog will examine why it is vital and what occurs if it is skipping. Let’s find out how to remove shear bolts.

How to Remove Shear Bolts

How to Remove Shear Bolts

Tools Needed To Remove Shear Bolts:

There are several tools you’ll need before you start to remove a shear bolt:

  • Strong clamp to hold the nut in place while it’s unscrewed.
  • A wrench that fits the bolt
  • Hammer
  • Wear protective gloves and clothing so you won’t be injured while doing this potentially dangerous job.

Terminate Shear Bolts Operating A Hex Key:

If you have the vital instruments, you can do it yourself. You can buy a shear bolt tool at your local hardware store, but a hex key is the best way to remove a shear bolt.

There are three steps to removing a shear bolt with a hex key:

  • You need to make sure you’re using the correct wrench.
  • Can’t just use any old wrench because these do not explicitly make for this.
  • You demand to make sure you know where the shear bolt is because you want to make sure you’re removing it in the right way.
  • It would assist if you kept a firm grip on the key.

Remove Shear Bolts Using Lubricant

Lubricants are a staple for mechanics. They help reduce friction between two things, including bolts and other fasteners. If you find a stuck bolt, you can use a lubricant to help get it out. You’ll want to use a lubricant like WD-40 to do this. Spray the Lubricant on the bolt and around the area of the bolt you’re trying to take out. Please stay a rare moment to position in, then use a wrenching to revolve the bolt. It should reach out without any trouble.

Remove Shear Bolts Using Torque Wrench:

A torque wrench is a necessary tool for any automotive technician. This article will talk about the steps to remove a shear bolt (a bolt that connects a fan clutch to the engine):

  • Use a 3/8″ drive ratchet to remove the shear bolt by turning counter-clockwise. We suggest the use of a breaker bar to increase torque.
  • Remove the fan shrouds to access the shear bolt.
  • Lubricate the end of the shear bolt to penetrate through the bolt. In various matters, you may also use piercing oil.
  • While holding the bolt tight with a ratchet, use a breaker bar and pull to remove the bolt.

Remove Shear Bolts Using Bolt Extractor:

If you use a bolt extractor, there are three things that you should consider diameter, length, and rotation. To begin with, you need to measure a bolt extractor whether fits in the bolt. If you pick the wrong extractor, you will waste time secondly, length.

The length of the extractor should be long enough to go through the hole in the bolt, and you can get a quick and straightforward measurement by looking at the thickness of the bolt, which is higher than the height of the part.

Finally, it would help to consider how the extractor rotates the bolt. If the bolt is too tight to the wall, the extractor will not turn, and you will not be able to remove it. So, you should have a wide bolt extractor that rotates easily to move the bolt out and down.

How To Remove Shear Bolts By Using A Drill?

Shear bolts differ from other bolts in that they design to break when a specific amount of tension is applied instead of dying from a tensile load. To remove a shear bolt, you must install a drill bit that is slightly bigger than the diameter of the bolt and drill entirely through the bolt. It is essential to use a drill bit that is just slightly bigger than the diameter of the bolt since drilling a hole too big will weaken the bolt. Once the drill bit inserts through the entire bolt length, the bolt will shear in half. The bolt will then become easily removable.

Safety Tips for Removing Shear Bolts

Safety Tips for Removing Shear Bolts
  • Shear bolts are used in the automotive industry as quick means to fasten two parts together. While shear bolts style to be broken free, improper removal can damage the bolts, threads, and the surrounding area. 
  • Pivot bolts, cotter pins, safety nuts, and other fasteners that hold parts to a structure
  • To remove a shear bolt, you’ll need to use a specific bolt and nut size.
  • The first step in removing shear bolts is to hold the bolt with a wrench and remove the nut. • An easy-to-follow guide to make working on your car, truck, or tractor a whole lot safer
  • Using a coating of grease or oil before applying the shear bolt will prevent rust.
  • When installing the shear bolt, it recommends applying grease or oil onto the bolt to prevent rust.

Frequently Asked Questions

How Do You Remove A Shear Bolt?

  • Cut it off with bolt cutters.
  • Drill off the head.
  • Use an angle hoagie to cut it off.

What Do You Know About Shear Bolts?

  • Shear bolts are used to secure the steel beams that make up a building. 
  • They are created of steel and hold a square shape.
  • They are used for lateral stability in situations with a risk of collapse.

What Grade Of Bolts Are Shear Bolts?

Shear bolts are Grade 5 (AKA 5/8-11)

What Kind Of Shear Bolt Is The Strongest?

  • The hex head bolt 
  • The round head bolt

Conclusion

In conclusion, removing shear bolts is a necessary safety precaution. Shear bolts style to release pressure on a structure during an earthquake, but they can also tear away at the building’s foundation. There are several methods for removing shear bolts, including drilling holes in the bolt head and inserting a threaded rod through it until it breaks loose, or using a hydraulic pump to apply pressure to the bolt head until it relinquishes its hold.

How to Remove Roof Racks without a Key | Different Methods Shared

0

The roof rack is one of the most valuable accessories invented for automobiles. It uses for transporting cars and other things to be kept strapped safely. It makes from lightweight aluminum, which is vital. It can hold a lot of pressure without any problem. But, sometimes it becomes a problem for drivers because it needs proper removal to avoid any insecurity. In this guide, I will teach you how to remove roof racks without a key.

Removing the roof rack from an automobile is straightforward if you know the process. The only tool needed is a Screwdriver which can use to remove bolts.

Can Shear Bolts Be Removed To Remove Roof Racks?

How to Remove Roof Racks without a Key

The most important to remember is that removing a shear bolt to remove a roof rack will make the frame unsafe. Removing the bolt will weaken the structure of the frame, allowing it to fail or collapse. The shear bolt location is there for safety.

It adds strength to the rack and prevents it from collapsing if part of the rack gets damaged. It can save your life if the object goes inaccurate with the frame and decides to collapse. It may look like a simple bolt, but it’s critical to the design.

How to Remove Roof Racks without a Key

How to Remove Roof Racks without a Key

If you follow these steps, removing roof racks will be a cinch! 

  • First off, find the screws holding the frames on your roof. 
  • You may need to move the shelves slightly to reach them, but don’t worry, the step is still easy! 
  • Now, unscrew the screws and remove the racks. 
  • You can keep them for future use; be sure not to store them where they can get damaged from weather or other objects. 
  • After removing the racks, inspect your roof for any damage, especially if you had to move the shelves to reach the screws. 
  • Now you have the roof racks you once had, but with the added benefit of a clean roof!

How to Remove Roof Racks with Cable Ties? 

Before you take a hammer and start smashing them off, there is a less destructive method that you may use to remove them. If you have a lighter, you may use it to loosen the tape. Use it to burn the end of the cable tie lightly, and then peel it off.

That should remove it from the roof racks without damaging the paint. If you don’t have a lighter, you should hit the cable tie lightly with a hammer. Then, it would help if you pulled the cable tie off the rack. It may damage the vehicle a little, but it shouldn’t be permanent. 

How to Remove Roof Racks with Philips Head Screwdriver? 

To remove your roof racks with a Philips head screwdriver, you will need to remove all the screws attaching the mounts/crossbars to your vehicle. You will then need to abolish the screws securing the mountains together. The last bolts may be #6 or #8 screws in the towers, depending on the bracket-style. 

It would help slide them off the mounts and set them aside to remove the buildings. Be careful not to set down them as they can be heavy. Once the towers are off, you can remove the mounts. 

How to Remove Roof Racks With A Chisel

Remove roof racks with a chisel. Foremost, utilize the hammer to extract the roof rack. The chisel needs to place next to the head of the bolt. Then, place the chisel on the inside of the plastic cover. 

Place the flat head screwdriver on the opposite side of the bolt. It will reduce the friction from the screwdriver. Then, you can use the chisel again. It will remove the bolt quickly. 

How to Remove Roof Racks Using a Sledgehammer

Removal of roof racks can be tricky, especially if a sledgehammer is involved. To remove roof racks from a vehicle, you need to follow these steps. Foremost, you require taking off the auto’s reel and dragging it from the car. Then you must lift the vehicle and put it on jack frames.

After that, you need to use a wrench to loosen the bolts holding the roof rack. Then you can use the sledgehammer to break the roof rack off. Then you need to check all of the places where the roof rack was to confirm that it removes a helpful video on how to remove roof racks.

Safety Tips to Remove Roof Racks without Key

Safety Tips to Remove Roof Racks without Key
  • Be sure to read the defensive tips before removing the roof racks.
  • Use care when removing the roof racks.
  • There’s no need to remove the roof racks before washing the vehicle.
  • Do not remove the roof racks from a vehicle parked on a grade.
  • Remove the roof racks only in dry weather.
  • Remove the roof racks only after removing any cargo on the roof.

Frequently Asked Questions

How Do I Unlock My Thule Roof Rack Without The Key?

Get bolt cutters from the nearest hardware store and cut them open.

Are Roof Rack Keys Universal?

  • Yea, while there’s no standardization. It might work on the car you want, but it’s not guaranteed.
  • Yes, all car keys are the same shape and size

How Do You Open A Locked Roof Rack Without A Key?

  • Remove the back and get to the release latch inside.
  • Get an oil can and spay it into the keyhole. Its oil can be lubricant!

How Do I Remove A Whip Bar Roof Rack Without The Key?

  • Pry open the latch from above and then pull out the brackets.
  • Take off the metal plates on each side of the silver latch at the front. 
  • Utilize wire blades to cut off both destinies of the safety on each bracket, and then drag out the racks.
  • Use pliers to bend back the metal tabs of each bracket at an angle, and then pull out the brackets. 
  • Drill two holes in each bracket

Conclusion

We hope you benefit from our article about removing a roof rack without the key. They will be able to remove the roof rack without using a key and do it in a way that will not cause any damage to the car. If you do not want to go through the hassle of taking your vehicle to a professional, then you can remove the roof rack by yourself.